利用CoreData来存储数据
2024-12-10
CRUD操作:
Create Read Update Destroy
名词解释
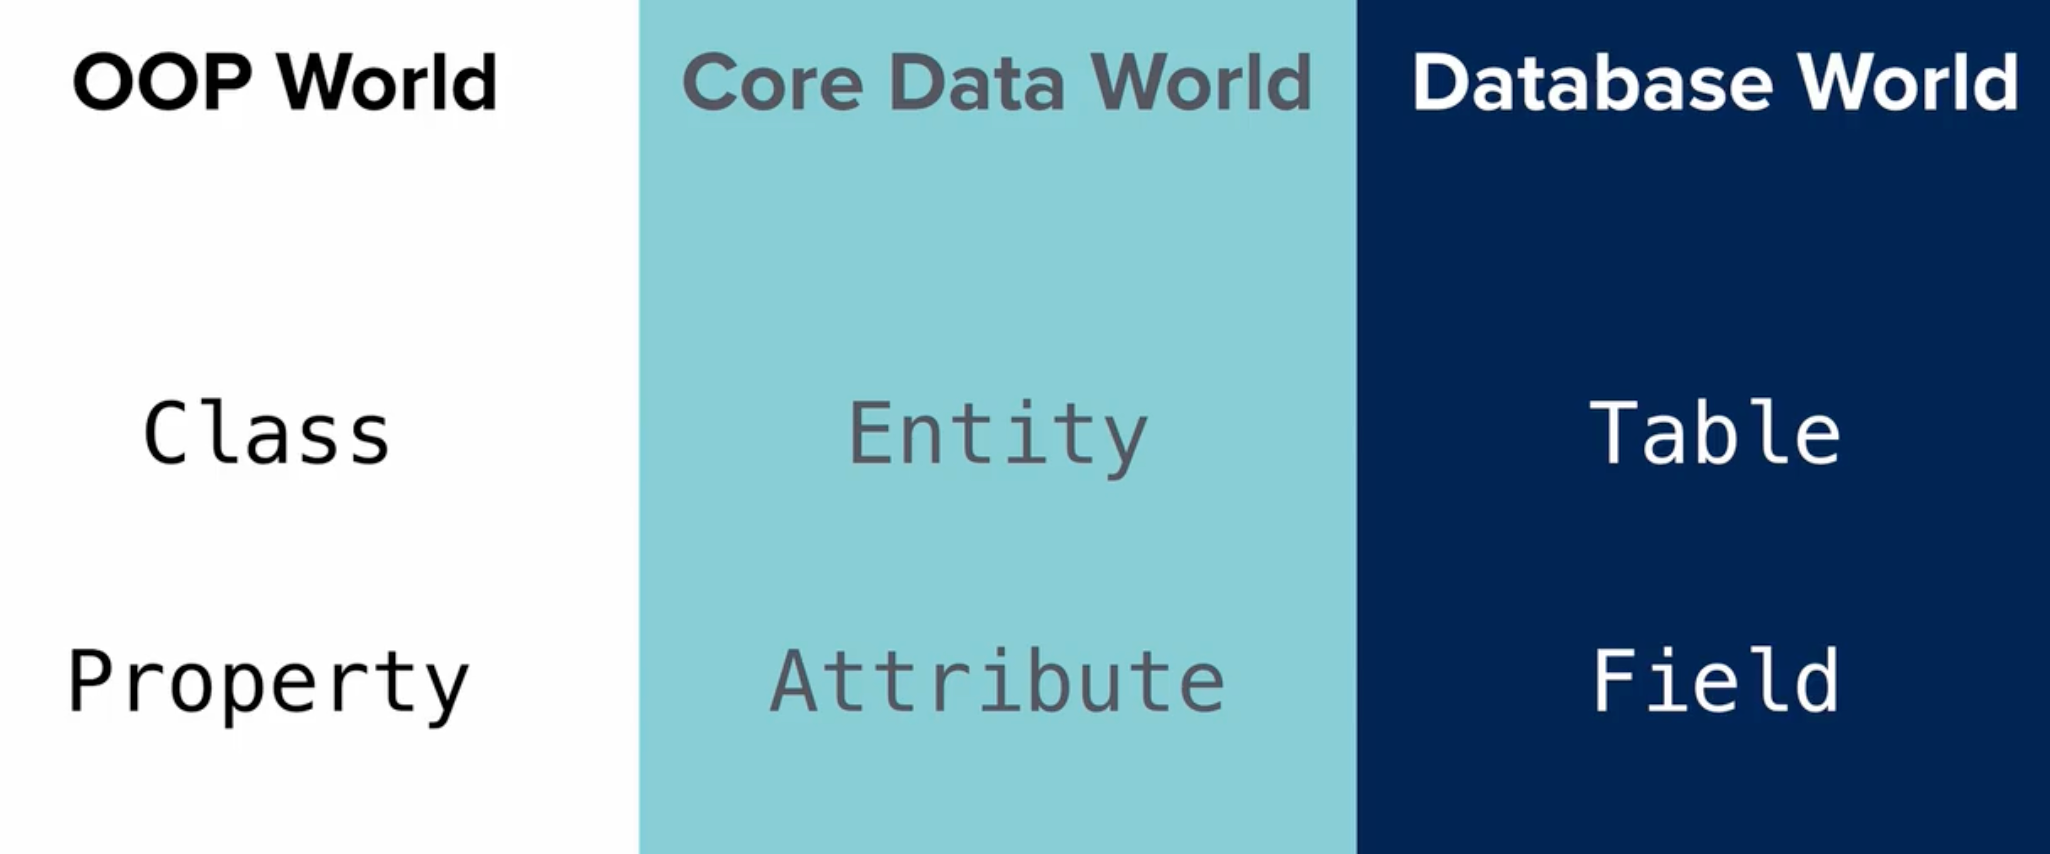
Entity 可以理解成Table或者Class
Attribute 可以理解成properties
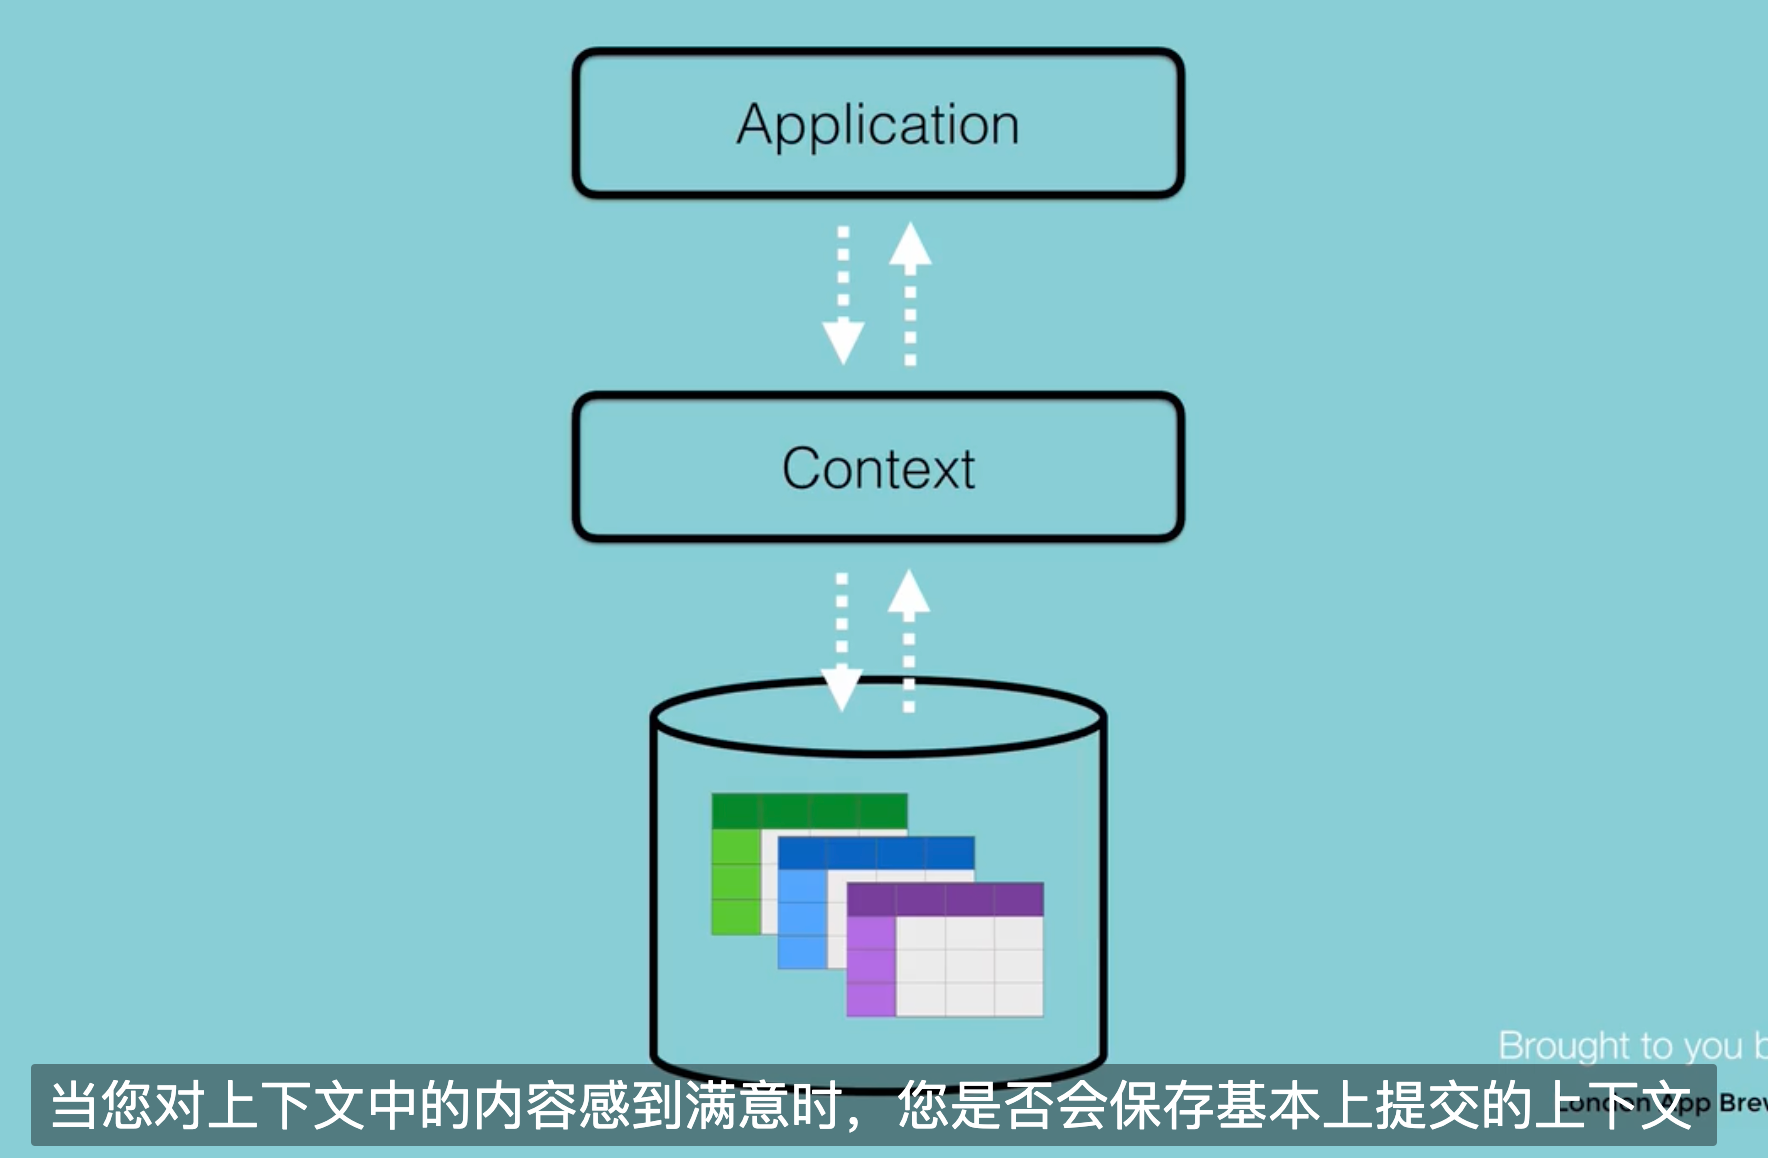
NSPersistentContainer 实际上一个SQLite Database,之所以不直接叫SQLite,因为你还可以用其他数据库,比如XML等。
context类似github的暂存区stash,直到你满意了,才提交修改到永久保存区。
NSObject 等于一个row。
类比图:
操作过程
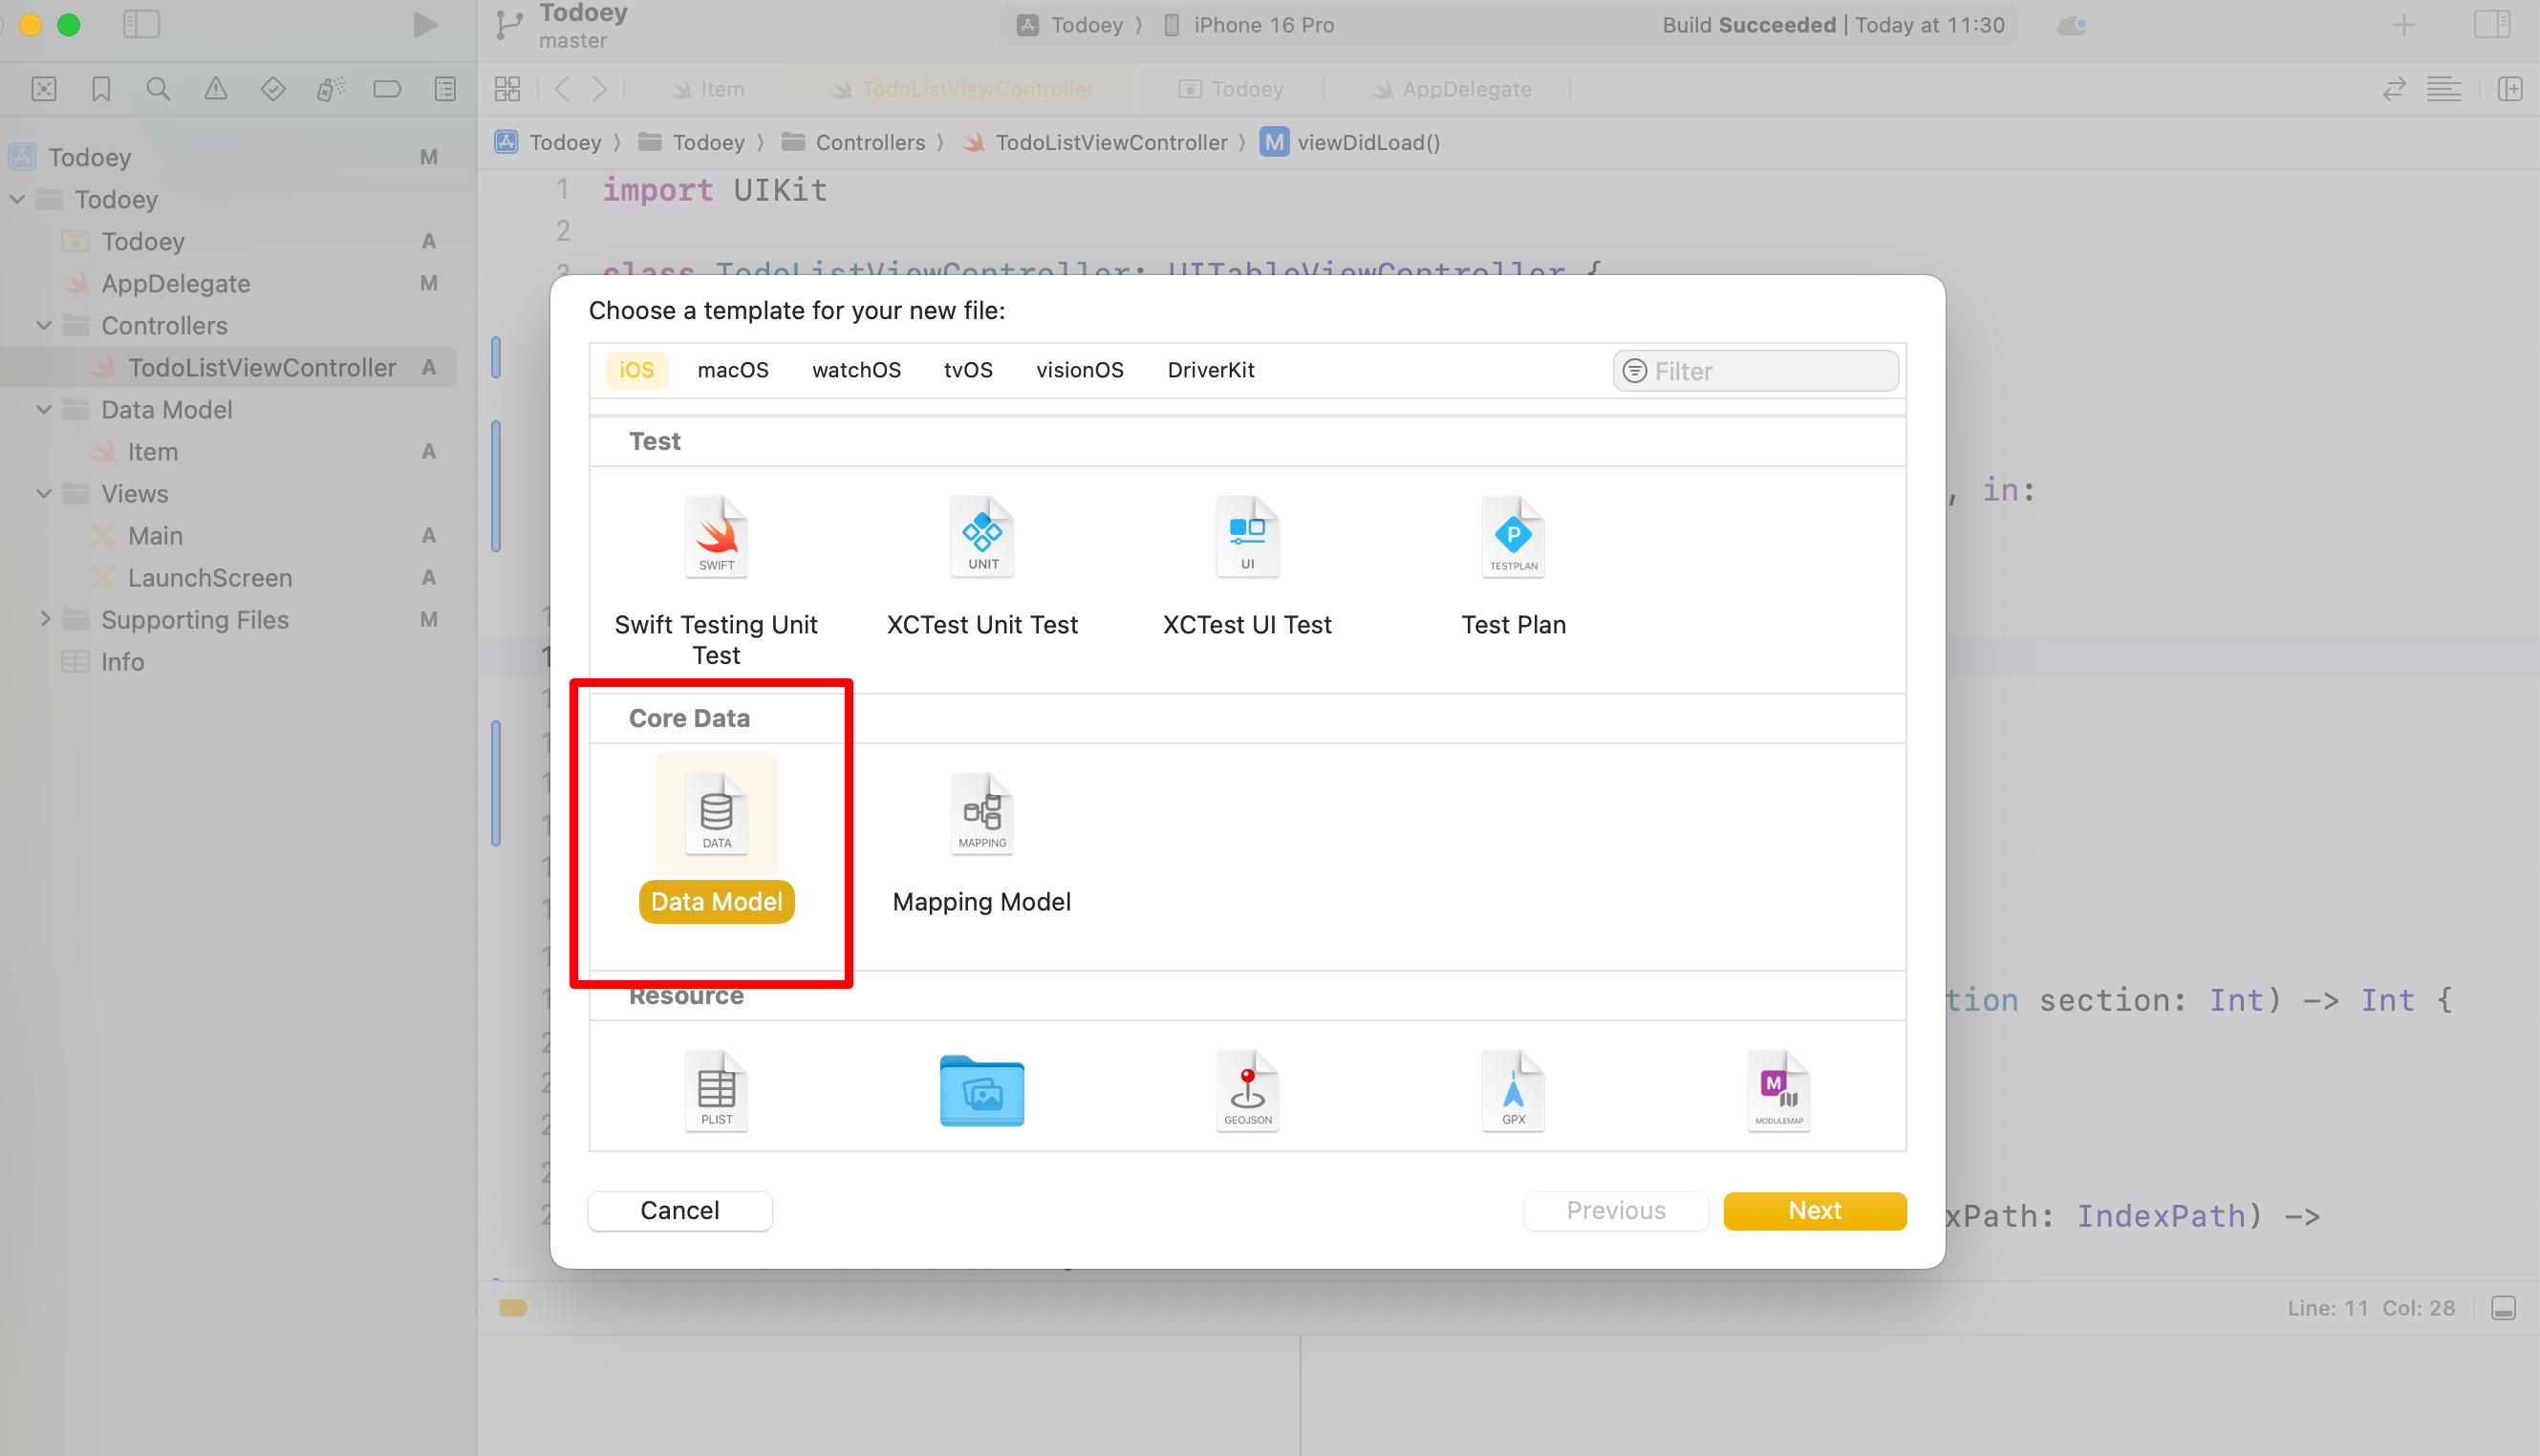
添加CoreData
两种方式:创建新项目或者添加文件
创建新项目
在新建项目中,storage选中CoreData。
添加文件
cmd + N 添加新文件,选择DataModel。
添加AppDelegate的CoreData方法
	import CoreData

    // MARK: - Core Data stack

    lazy var persistentContainer: NSPersistentContainer = {
        /*
         The persistent container for the application. This implementation
         creates and returns a container, having loaded the store for the
         application to it. This property is optional since there are legitimate
         error conditions that could cause the creation of the store to fail.
        */
        let container = NSPersistentContainer(name: "CoreDataTest")
        container.loadPersistentStores(completionHandler: { (storeDescription, error) in
            if let error = error as NSError? {
                // Replace this implementation with code to handle the error appropriately.
                // fatalError() causes the application to generate a crash log and terminate. You should not use this function in a shipping application, although it may be useful during development.

                /*
                 Typical reasons for an error here include:
                 * The parent directory does not exist, cannot be created, or disallows writing.
                 * The persistent store is not accessible, due to permissions or data protection when the device is locked.
                 * The device is out of space.
                 * The store could not be migrated to the current model version.
                 Check the error message to determine what the actual problem was.
                 */
                fatalError("Unresolved error \(error), \(error.userInfo)")
            }
        })
        return container
    }()

    // MARK: - Core Data Saving support

    func saveContext () {
        let context = persistentContainer.viewContext
        if context.hasChanges {
            do {
                try context.save()
            } catch {
                // Replace this implementation with code to handle the error appropriately.
                // fatalError() causes the application to generate a crash log and terminate. You should not use this function in a shipping application, although it may be useful during development.
                let nserror = error as NSError
                fatalError("Unresolved error \(nserror), \(nserror.userInfo)")
            }
        }
    }
修改上面的PersistentContainer的名字
需要和你创建的DataModel的文件名一样。
let container = NSPersistentContainer(name: "DataModel")
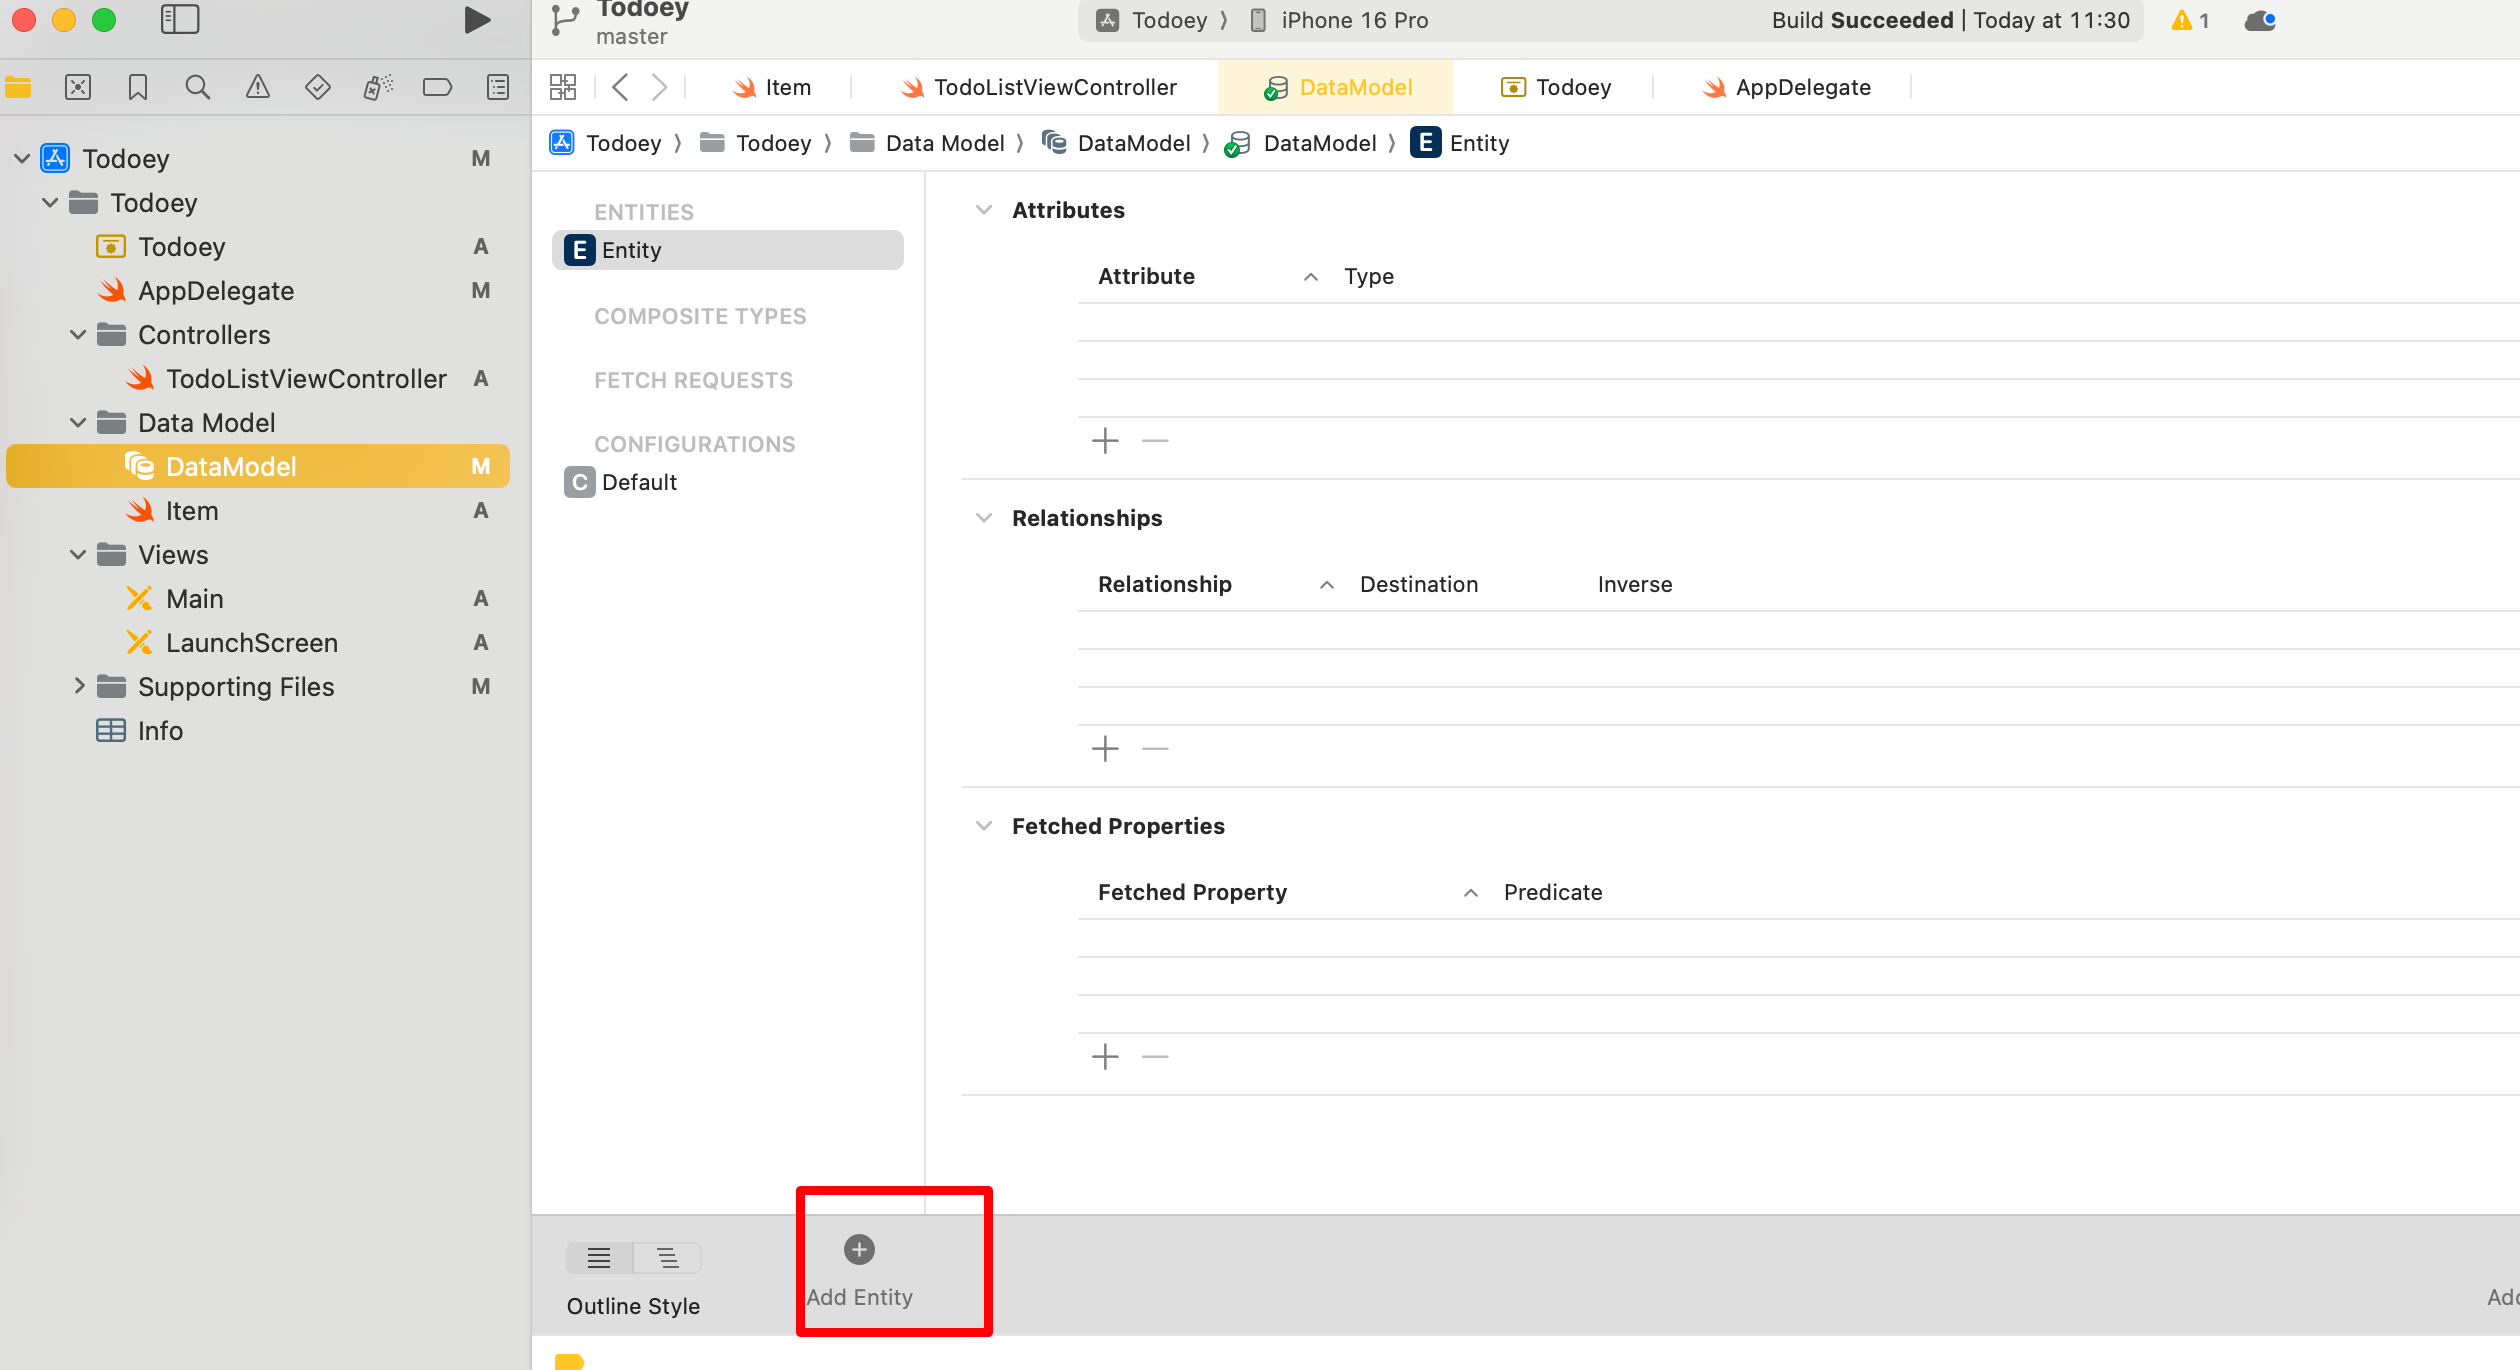
添加新表
在DataModel下方的+号,点击Add Entity。
双击Entity,可以修改名字。
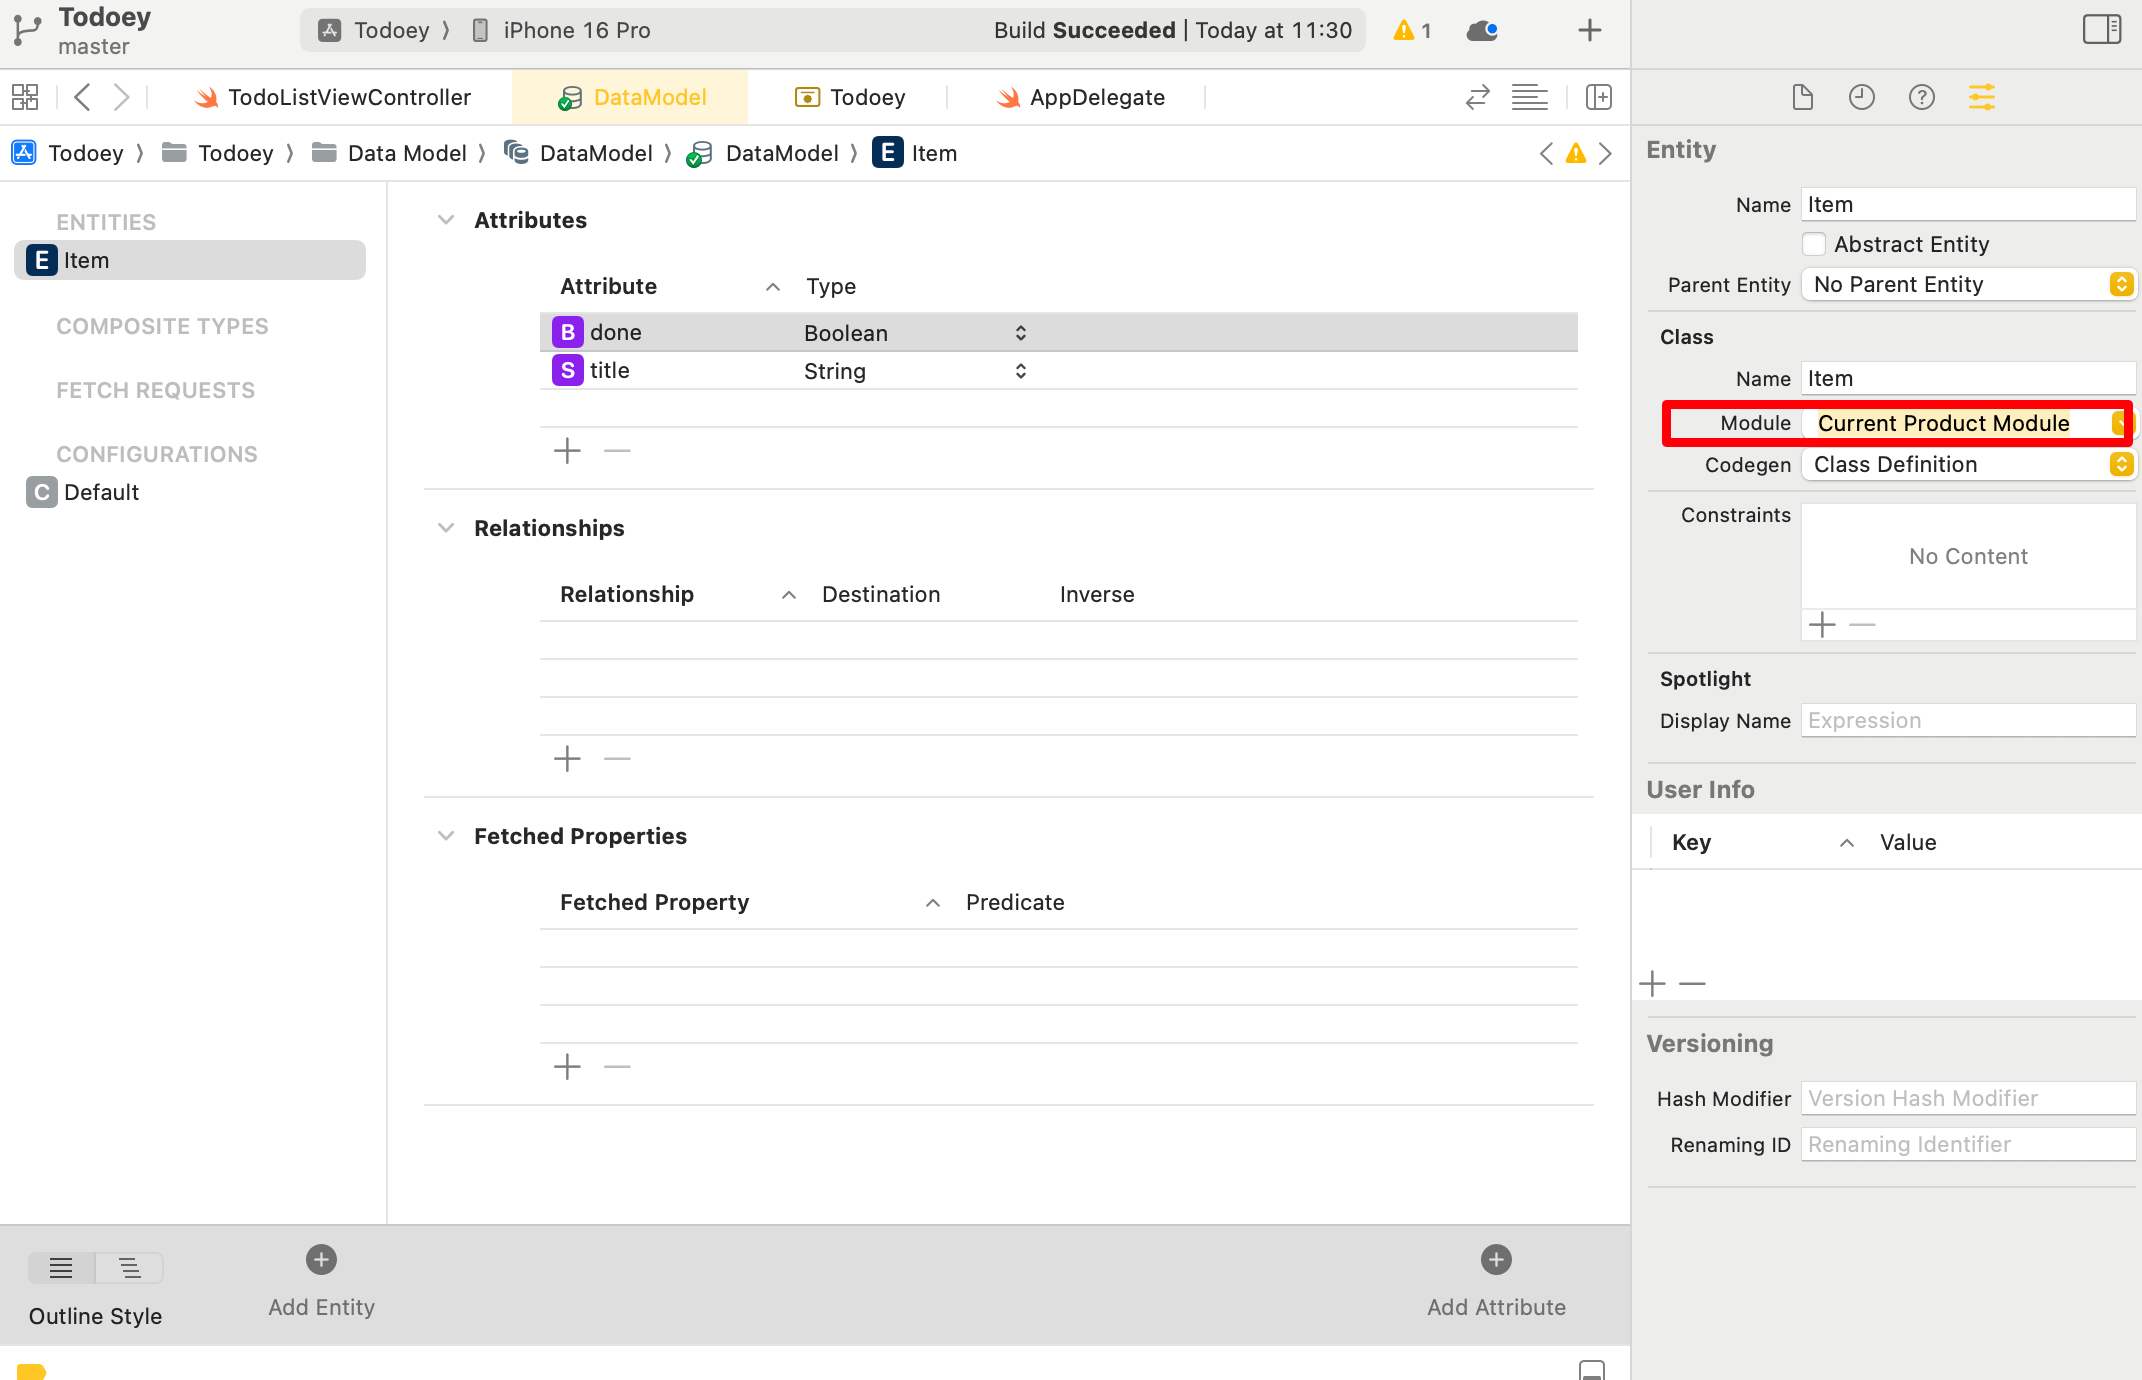
将表设置为当前项目
inspector菜单 - Current Product Module
添加attribute (column)
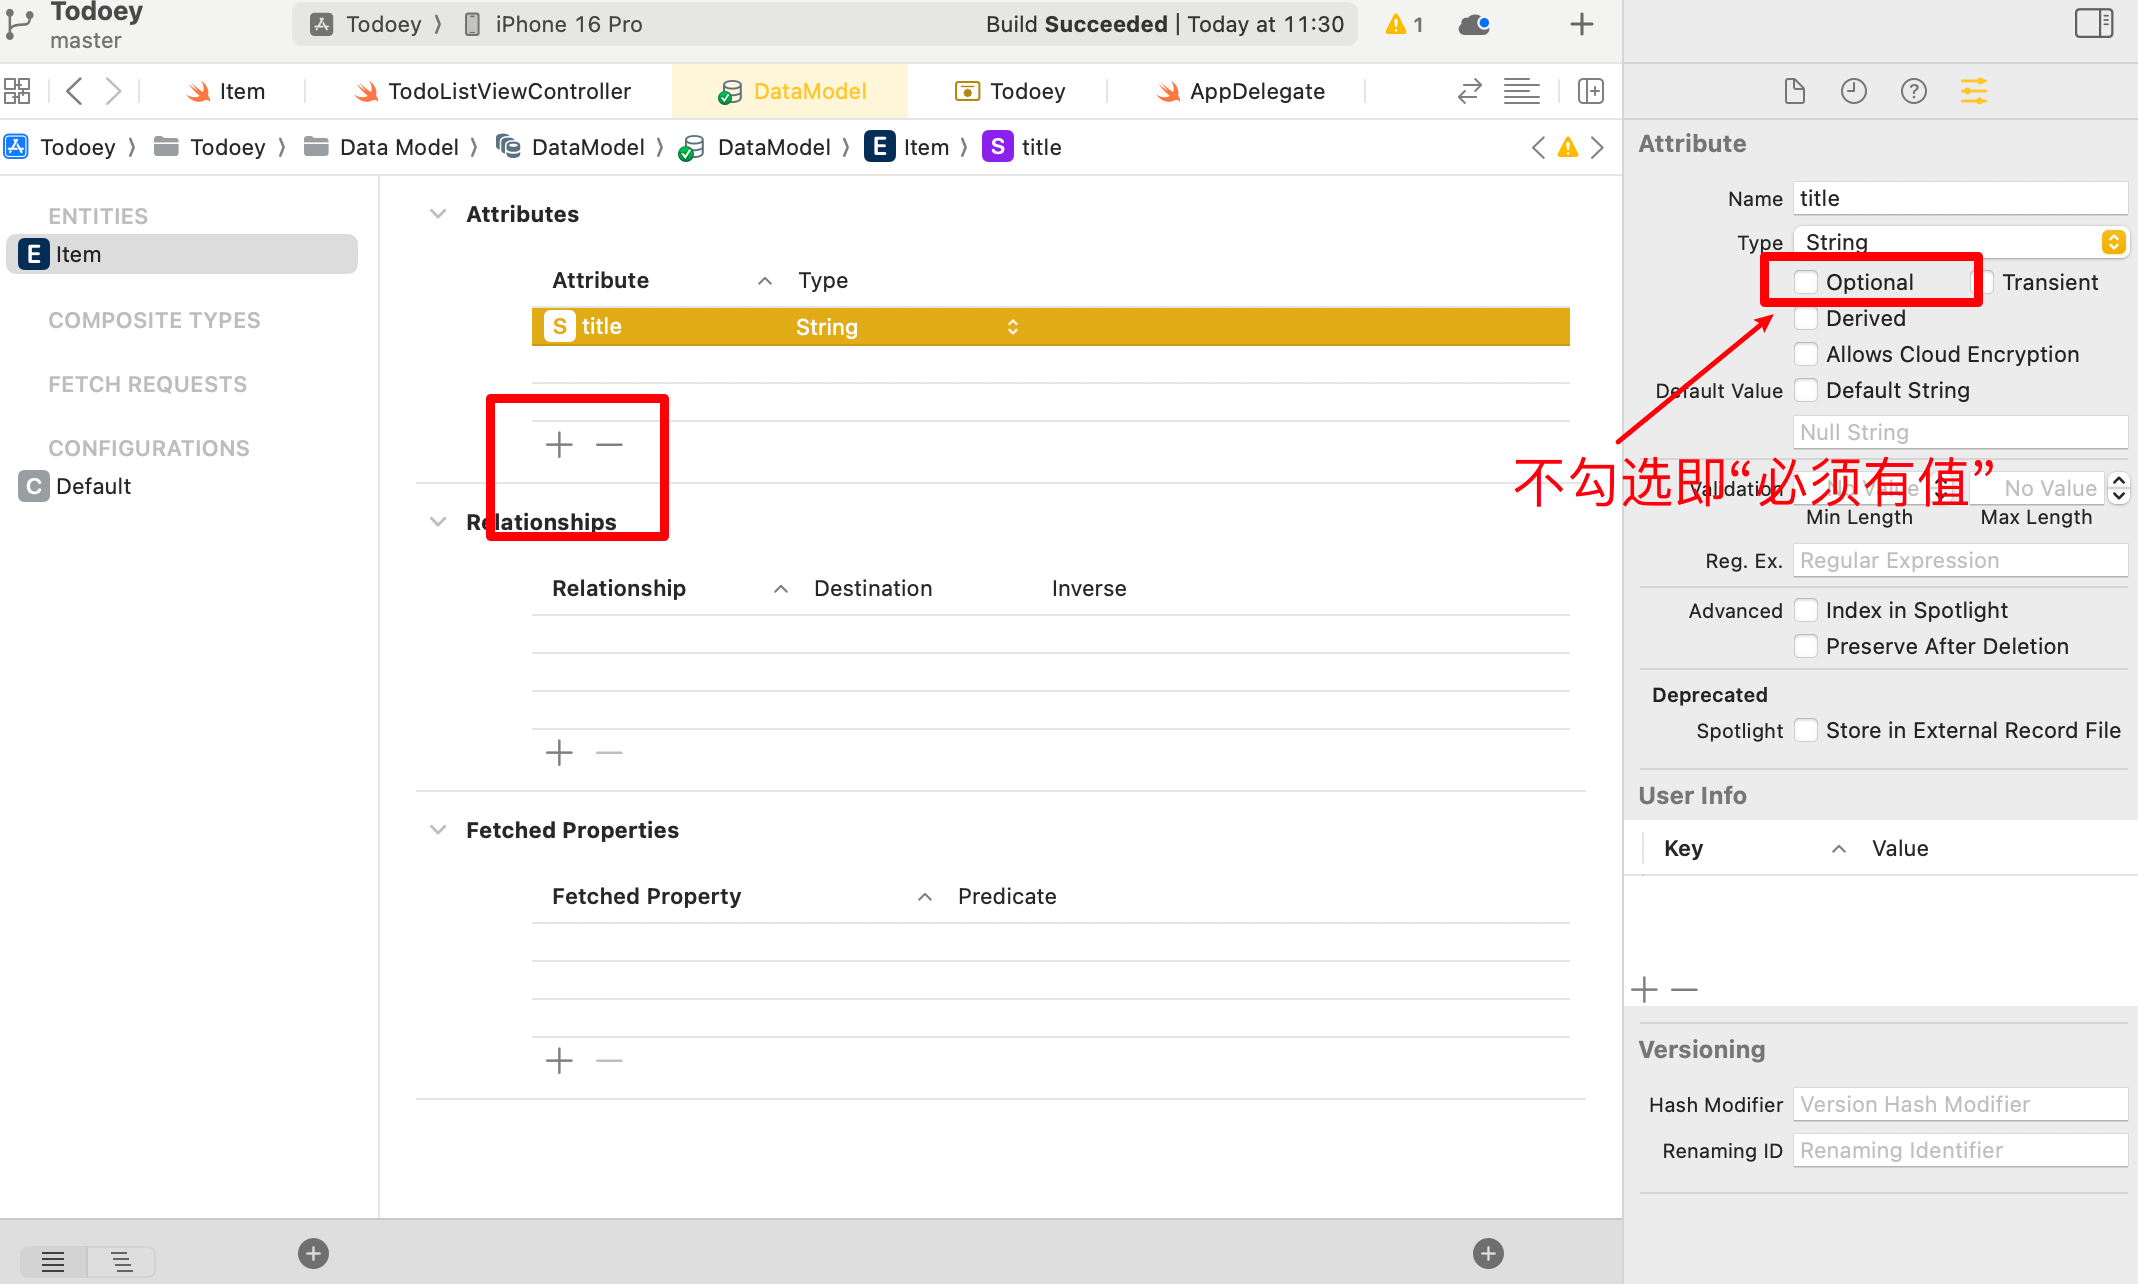
如果是optional,即可选项;如果不勾选,则表示必须有值。
添加数据 Create
设置context变量
let context = (UIApplication.shared.delegate as! AppDelegate).persistentContainer.viewContext
在add button下面添加数据
                let newItem = Item(context: self.context)

                newItem.title = textField.text!
                newItem.done = false

saveItem()
规定saveItem()
func saveItems(){
        do{
            try context.save()
        } catch {
            print("Error Saving Context \(error)")
        }
    }
读取数据 Read
-
首先建立一个request,这里不能类型推断,要定义好类型。
-
保存好context.fetch()
-
直接在viewDidLoad里面loadItems即可。
 func loadItems(){
        let request : NSFetchRequest<Item> = Item.fetchRequest()
        do{
            itemArray = try context.fetch(request)
        } catch {
            print("Error fetching data from context. \(error)")
        }
    }
更新数据 Update
直接修改属性即可。
itemArray[indexPath.row].done = !itemArray[indexPath.row].done
删除数据 Delete
注意:顺序不能弄错,要先删除数据库,再删除视图UI。
        //删除数据(需要按照顺序)
        context.delete(itemArray[indexPath.row]) //从数据库删除
        itemArray.remove(at: indexPath.row) //从视图删除
查询数据
需要用到NSPredicate。搜索语法参考:
extension TodoListViewController: UISearchBarDelegate{
    func searchBarSearchButtonClicked(_ searchBar: UISearchBar) {
        let request : NSFetchRequest<Item> = Item.fetchRequest()

        //[cd]指对大小写Capital和变音diacritic不敏感
        request.predicate = NSPredicate(format: "title CONTAINS[cd] %@", searchBar.text!)

        request.sortDescriptors = [NSSortDescriptor(key: "title", ascending: true)] //只有一个rule

        loadItems(request)
    }
}
loadItem()改造。
    func loadItems(_ request: NSFetchRequest<Item> = Item.fetchRequest()){
        do{
            itemArray = try context.fetch(request)
        } catch {
            print("Error fetching data from context. \(error)")
        }

        tableView.reloadData()
    }
