ios如何创建聊天窗口-UITableView
2024-11-27
按+号搜索"Table View"。
信息展示搜索"Table View Cell"
使用tableView
实际上就是delegate的实现。
viewDidLoad里面完成delegate,这里是dataSource
register用于注册我们后面要使用的cell。用nibName来区分是哪个风格cell,为的是寻找对应的.xlb文件(一般也是Class的名字),这个可以复用。而identifier则不可以复用。一个nibName可以对应多个identifier。
tableView.dataSource = self

tableView.register(UINib(nibName: K.cellNibName, bundle: nil), forCellReuseIdentifier: K.cellIdentifier)
最后面创建一个extension来用protocol:
//MARK: - UITableViewDataSource
extension ChatViewController: UITableViewDataSource{
    //有多少行
    func tableView(_ tableView: UITableView, numberOfRowsInSection section: Int) -> Int {
        return messages.count
    }

    //用哪个cell
    func tableView(_ tableView: UITableView, cellForRowAt indexPath: IndexPath) -> UITableViewCell {
        let cell = tableView.dequeueReusableCell(withIdentifier: K.cellIdentifier, for:indexPath)
        cell.textLabel?.text = messages[indexPath.row].body
        return cell

    }
}
注意:UITableViewDelegate的使用
为什么用DataSource这个protocol?因为是输入数据。
如果需要在选择数据时做相应的操作,才需要用Delegate这个protocol。
取消用户选择效果-变灰
storyboard里面选中cell,将selection设置为none即可。现在用户就不可以选择每个cell了,这是聊天软件的正常行为,而不是像信息软件或者邮件软件那样。
使用TableViewController
非常简单,不需要delegate和protocol。
import UIKit

class TodoListViewController: UITableViewController {

    let itemArray = ["Find Mike", "Buy Eggos", "Destory Demogorgon"]

    override func viewDidLoad() {
        super.viewDidLoad()
    }

    //每个分区section有多少行row
    override func tableView(_ tableView: UITableView, numberOfRowsInSection section: Int) -> Int {
        return itemArray.count
    }

    //用哪个cell;indexPath即对应上面的row
    override func tableView(_ tableView: UITableView, cellForRowAt indexPath: IndexPath) -> UITableViewCell {
        let cell = tableView.dequeueReusableCell(withIdentifier: "ToDoItemCell", for: indexPath)
        cell.textLabel?.text = itemArray[indexPath.row]
        return cell
    }
}
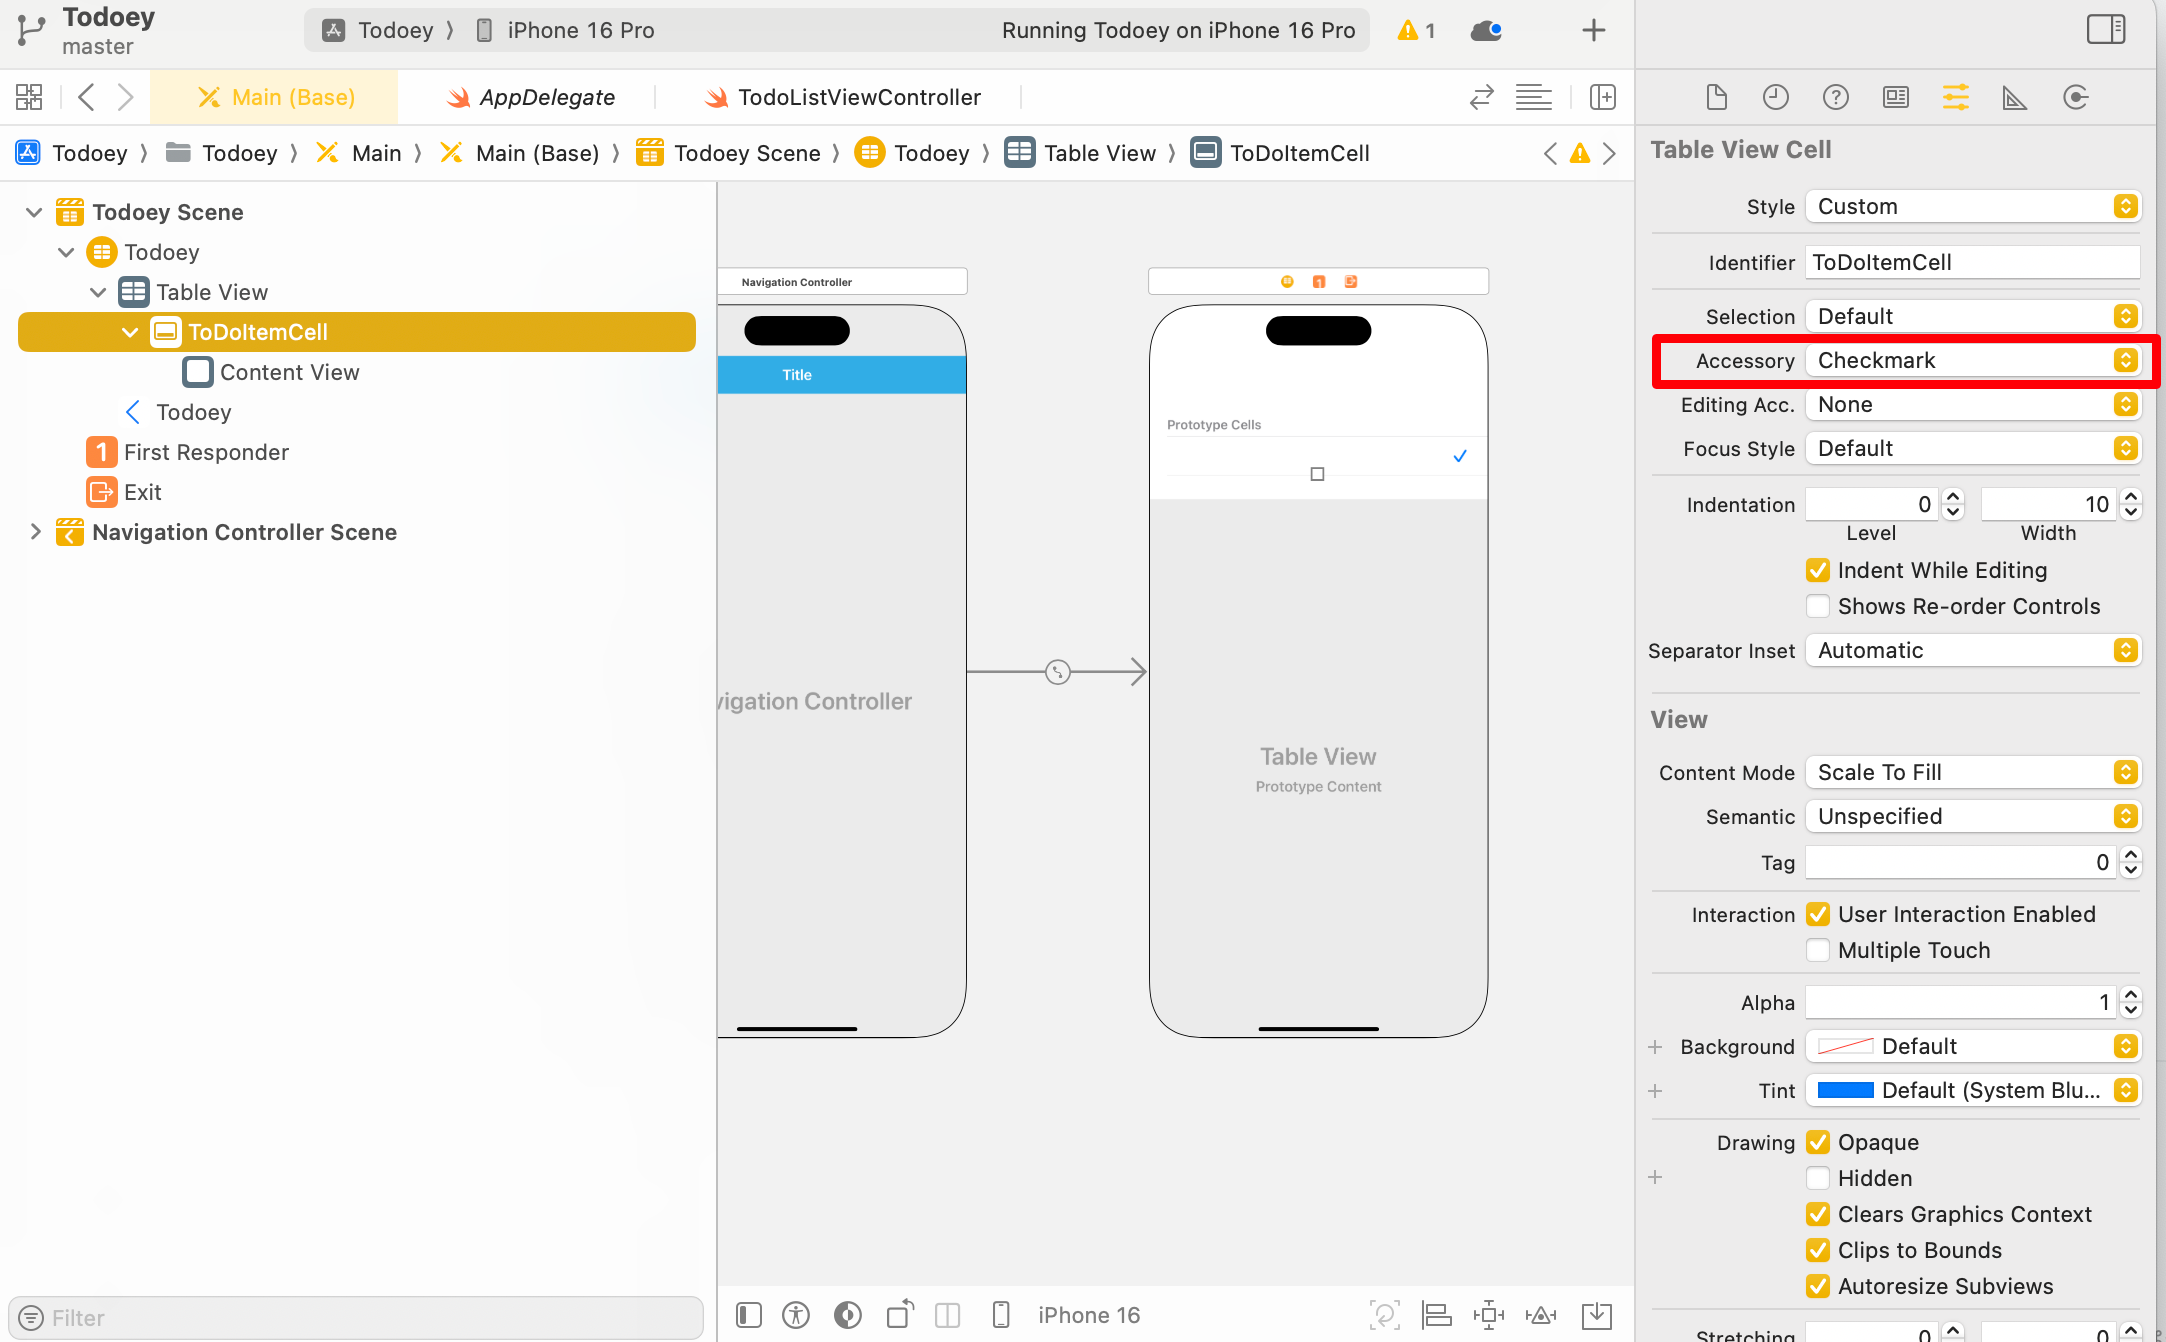
swift如何给cell右边加勾选符号?
storyboard中选中cell - 属性界面 - Accessory - Checkmark

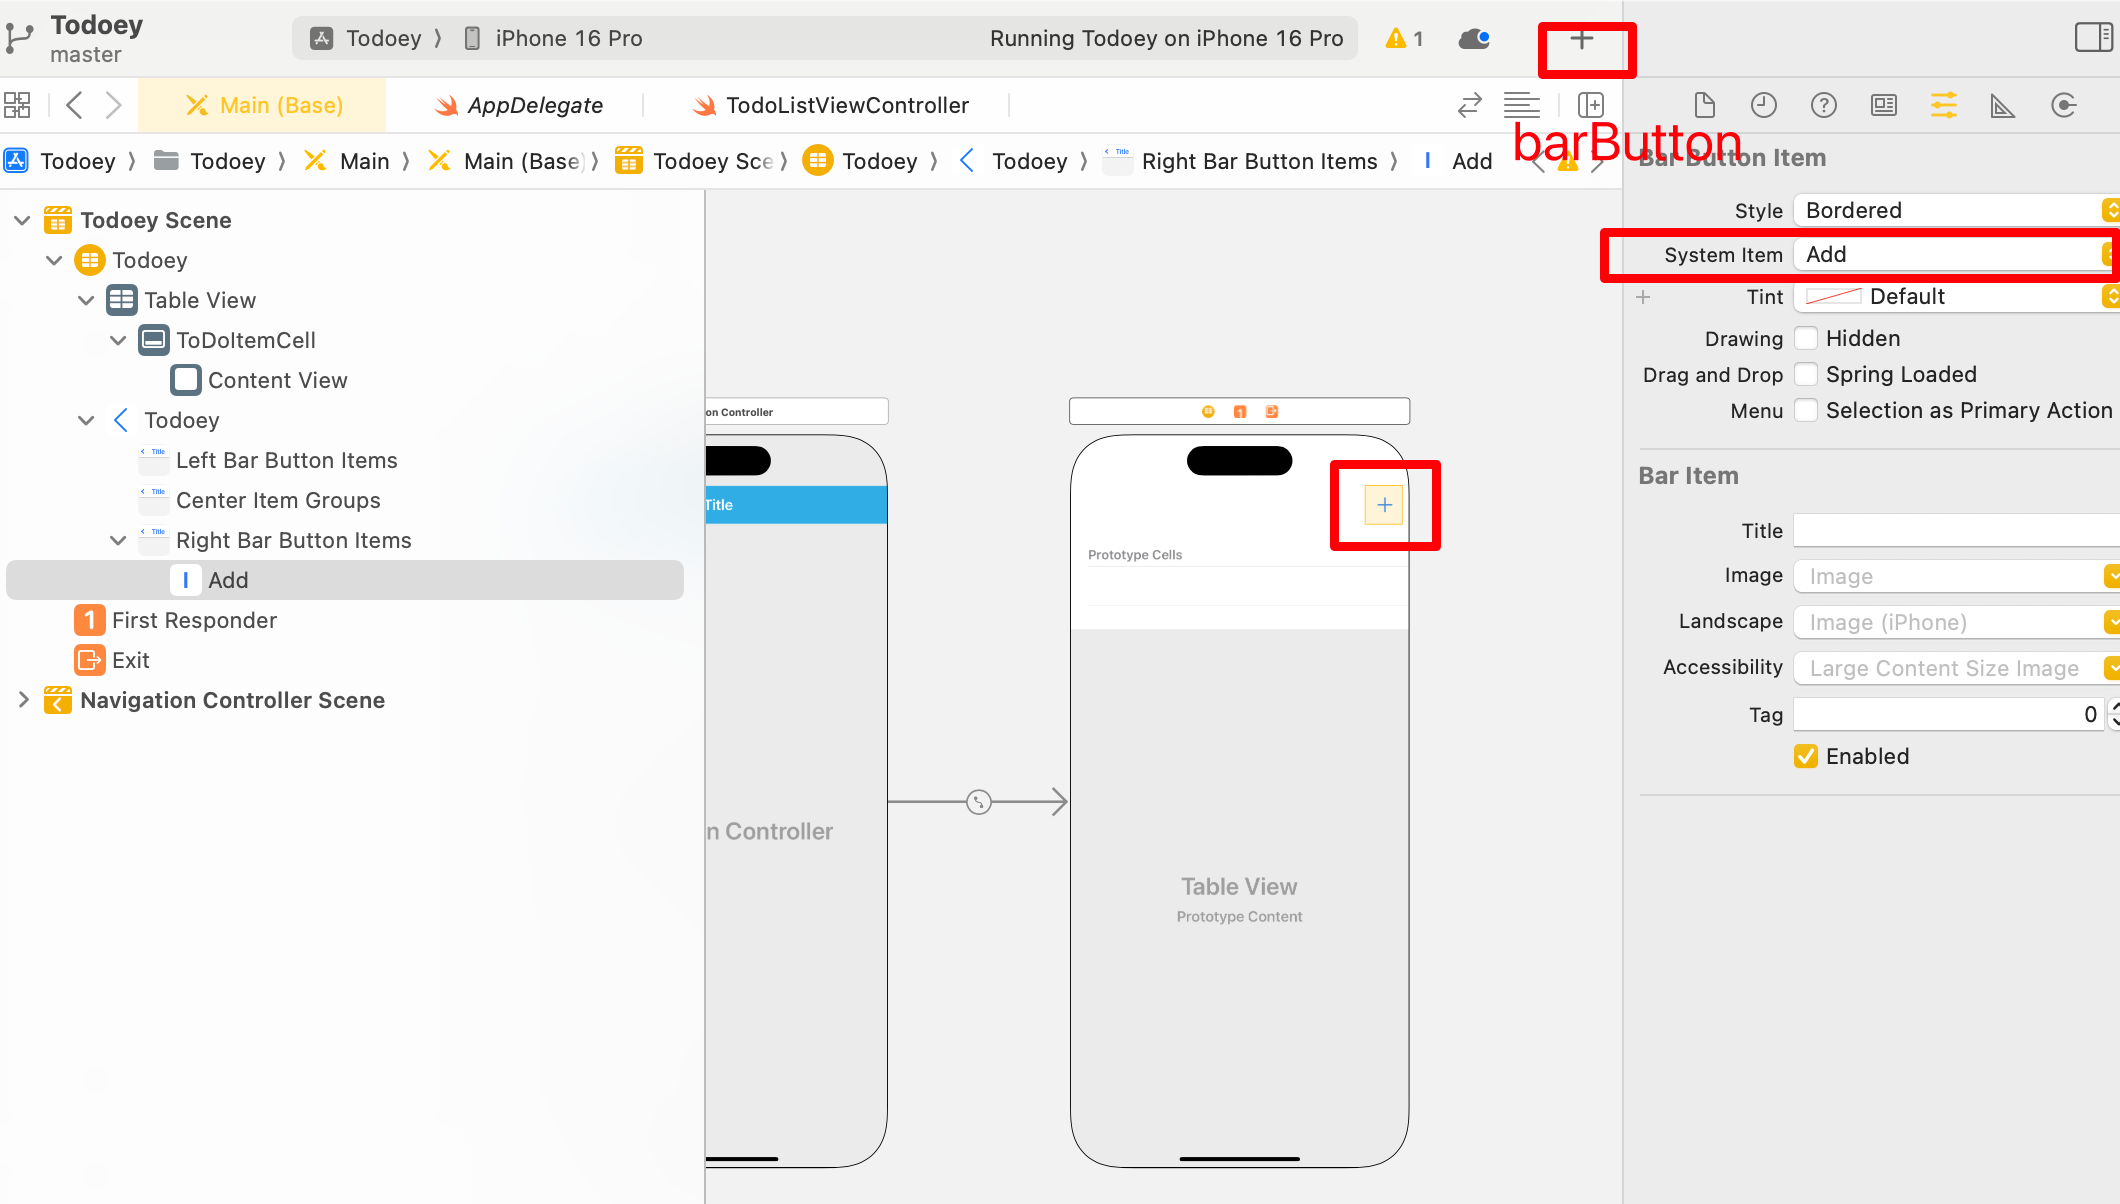
swift 如何添加+按钮?
添加bar Button,将System Item属性改为Add。

