swift如何连接第二屏Segue
2024-11-22
storyboard-segue跳转的知识汇总
segue的四种跳转方式
show:切换至第二屏,需要和Navigation Controller配合使用,否则和present modally一样效果。
Navigation Controller需要点中主屏幕黄点,Editor-Embed in-Navigation Controller设置。
present modally: 新一屏覆盖上一屏,下拉消失。
show detail:右侧详情设置
present as popover:小窗口,一般是iPad用到。
segue的跳转代码
performSegue(withIdentifier: "goToSecond", sender: self)
segue的回头代码
当segue是present modally才是有效的。
self.dismiss(animated: true)
segue数据通信
通过prepare函数进行:
 override func prepare(for segue: UIStoryboardSegue, sender: Any?) {
        if segue.identifier == "goToSecond" {
            if let secondVC = segue.destination as? SecondViewController {
                secondVC.secondValue = "Hell"
            }
        }
    }
为什么不在performSegue中一同进行,还有多加个函数?因为performSegue是指Storyboard传递,不能直接由代码传递,因此识别不了页面切换外的代码。
swiftUI页面切换
通过navigationLink跳转
优点:直观。
缺点:必须通过NavigationView,结构不简洁。
        NavigationView {
            NavigationLink(destination: SecondView()) {
                Text("跳转")
                    .font(.largeTitle)
            }
        }
通过@state和.sheet条件跳转
优点:适合条件跳转。
缺点:代码复杂。
    @State var showSecondView = false

    var body: some View {
        Button("跳转"){
            showSecondView = true
        }
        .font(.largeTitle)
        .sheet(isPresented: $showSecondView){
            SecondView()
        }
    }
方法一:新建Cocoa touch类
利用storyboard创建第二屏的结构
选择ViewController插入。
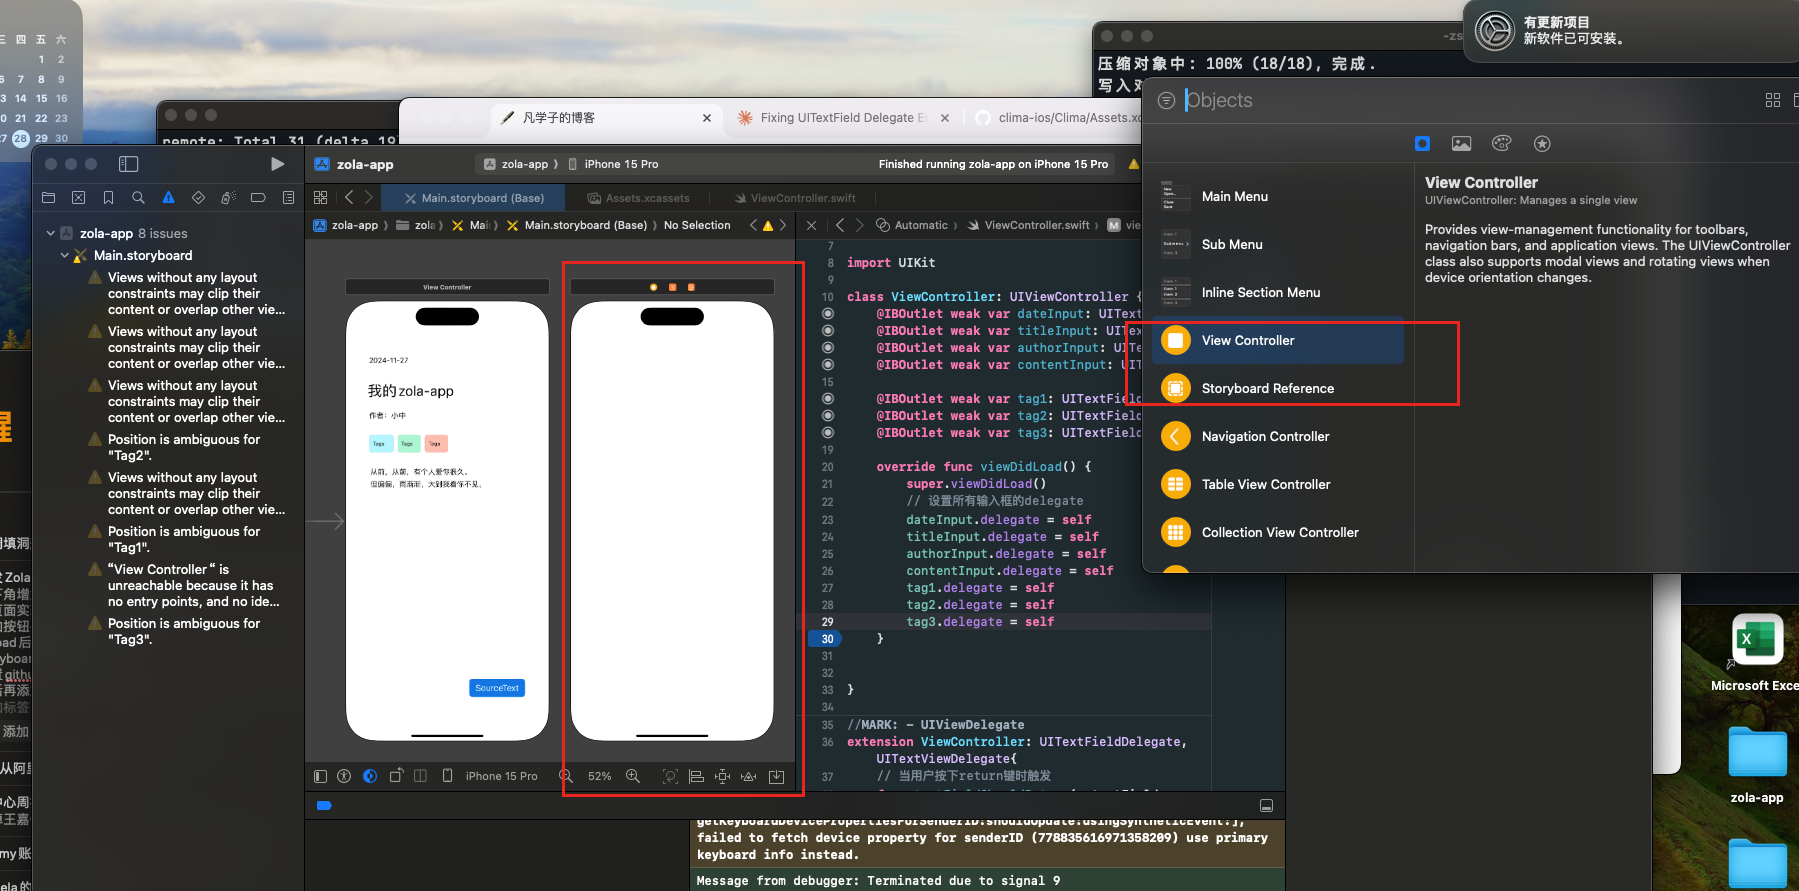
cocoa touch class
比用代码创建更方便
subclass: UIViewController
设置identity连接
点击main-storyboard里面黄色按钮,输入cmd+option+4,调出inspector菜单。 在Class里面输入之前设置的Class即可。
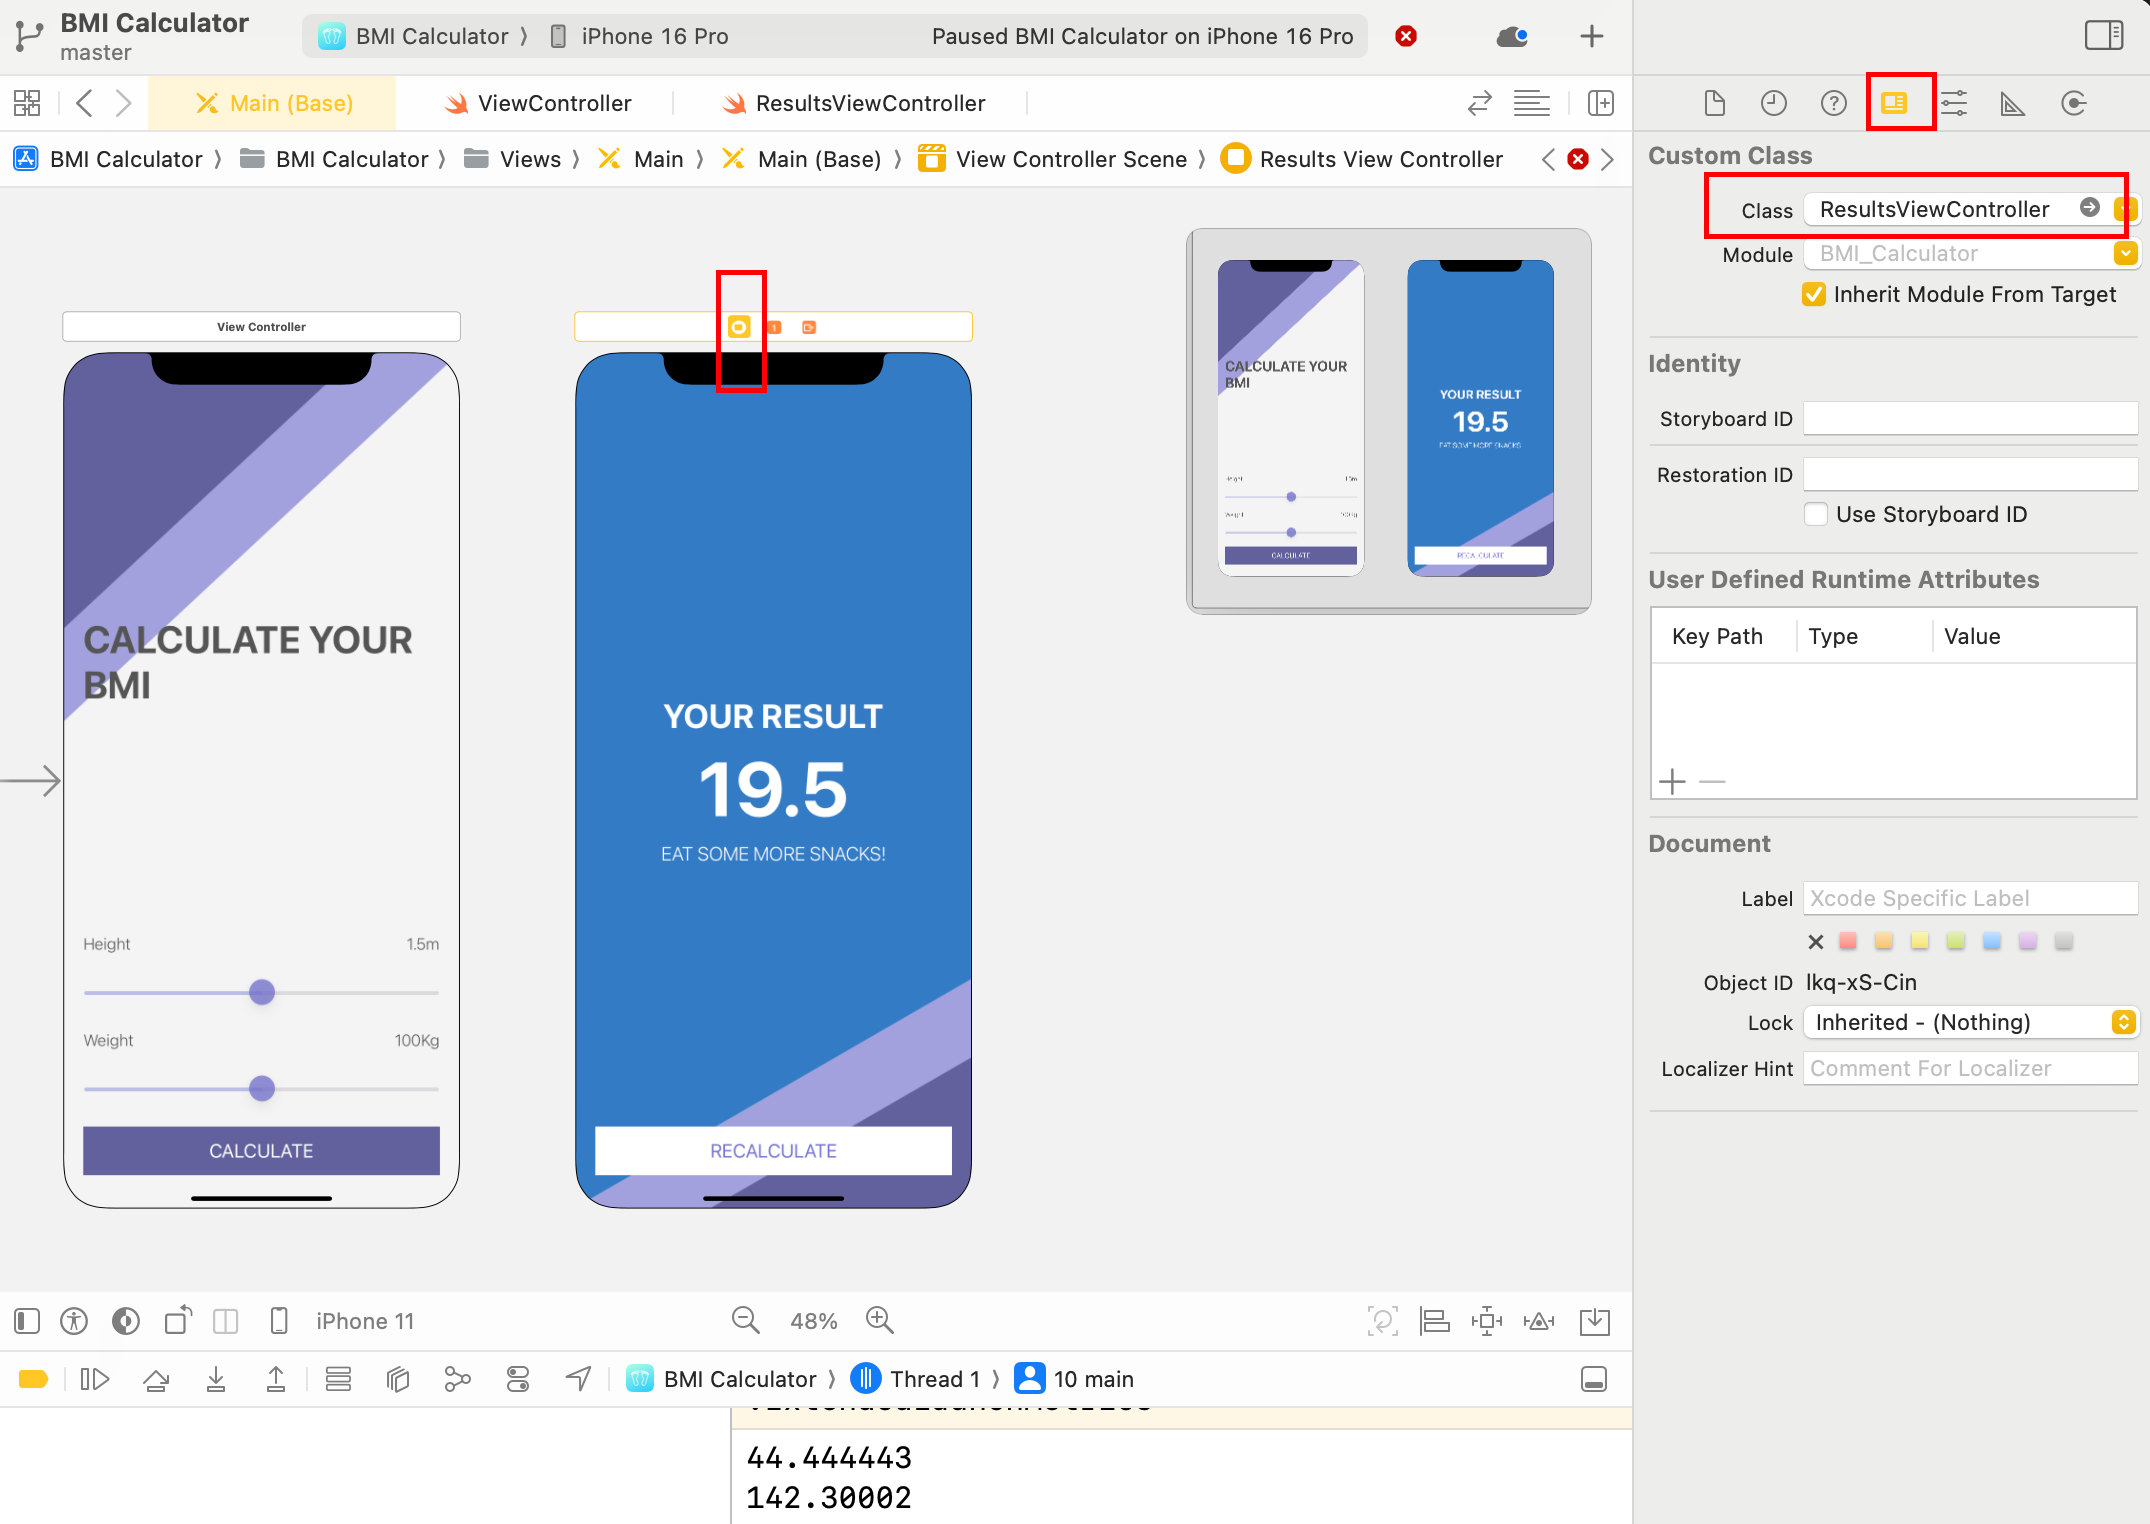
操作代码
cmd+ctl+option + Enter,可以出现assistant view,就可以调试代码和storyboard窗口,按住ctrl拖动元素到代码窗口了。
连接图形
按住ctrl,拉动第一屏的黄色方形按钮,连接第二屏。
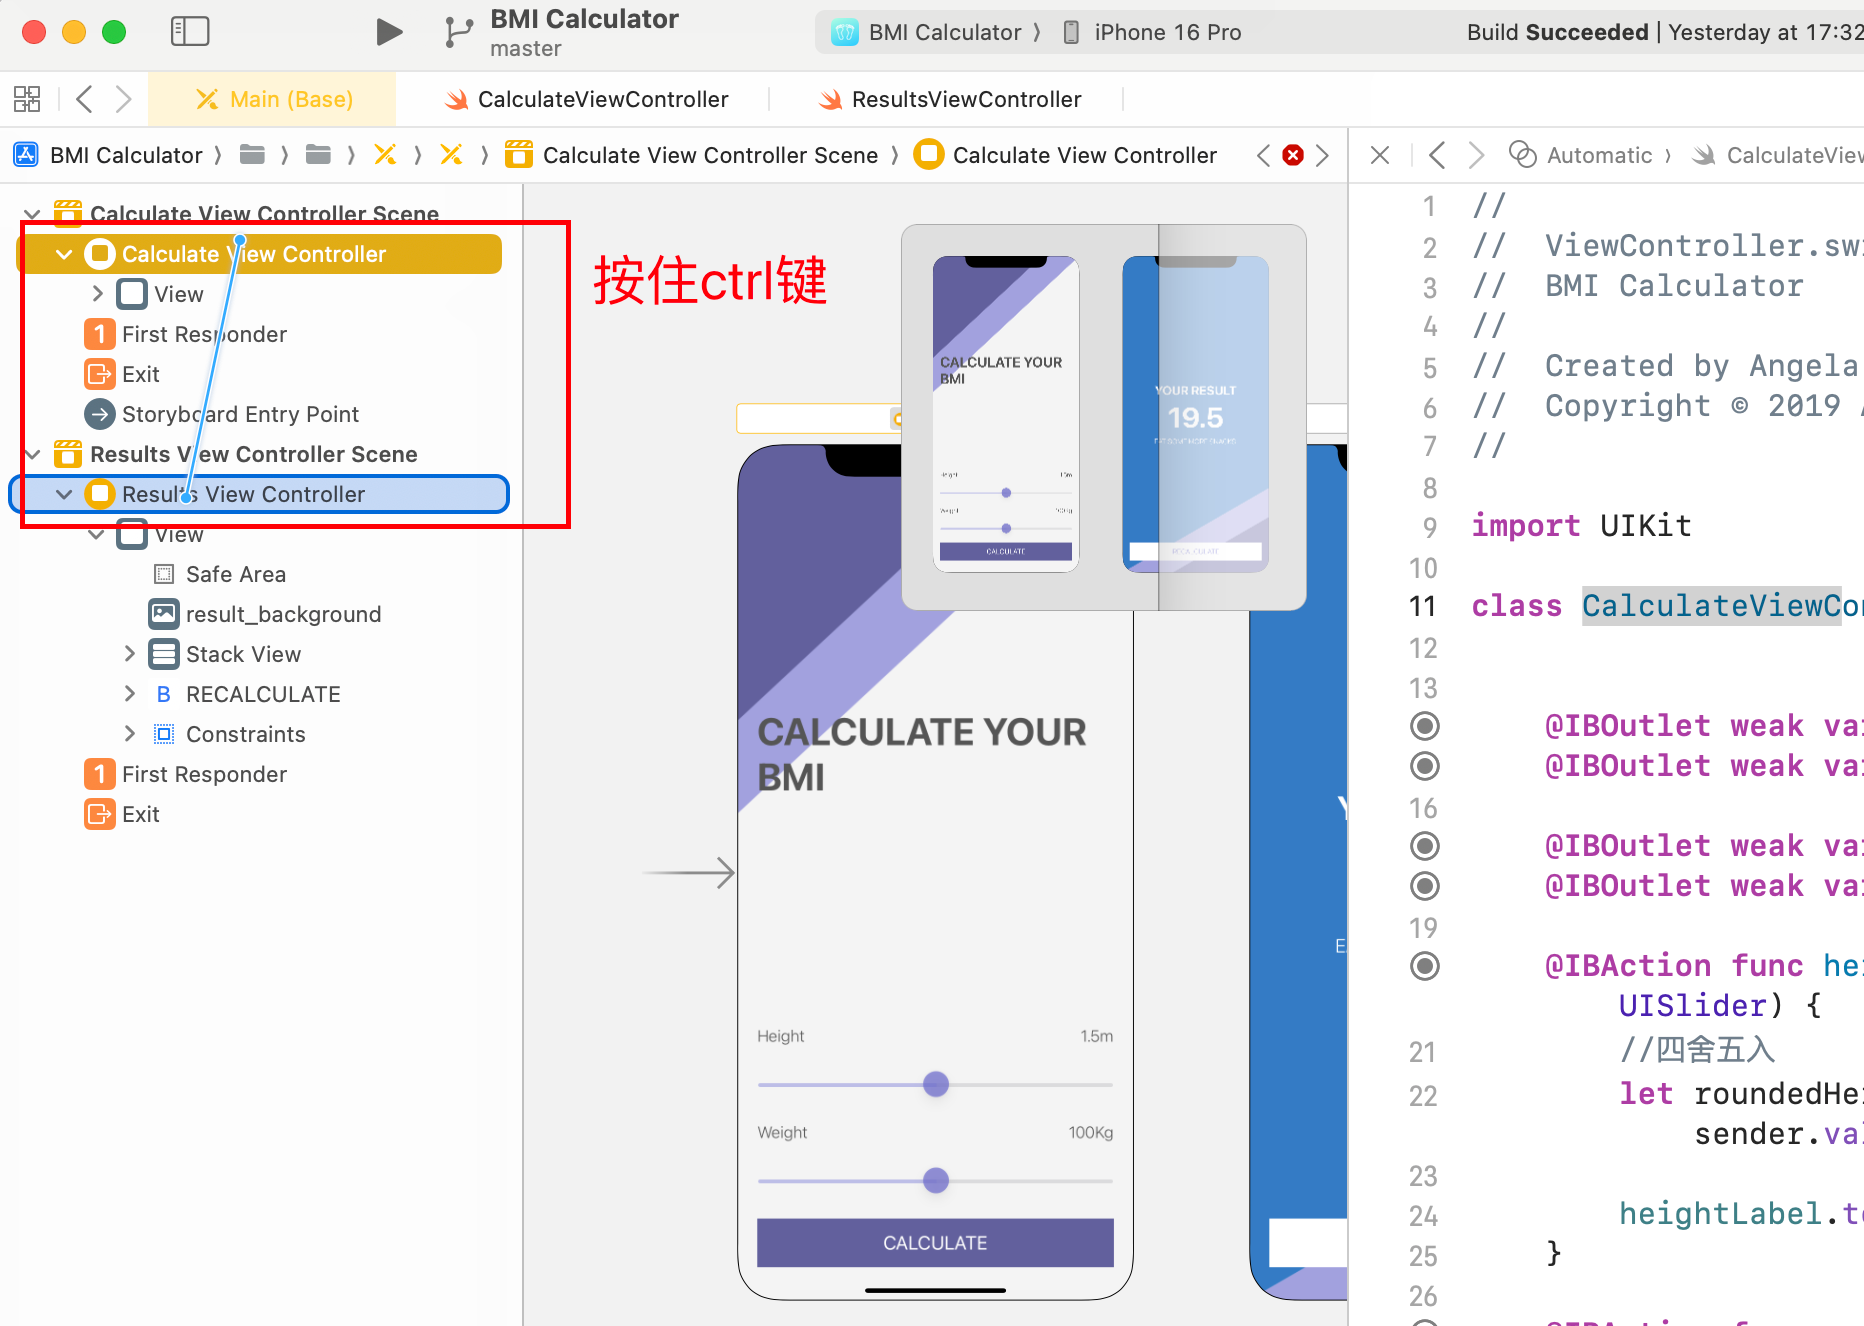
选择Present Modally
或者选择某一个按钮,直接拉到其他屏幕上:
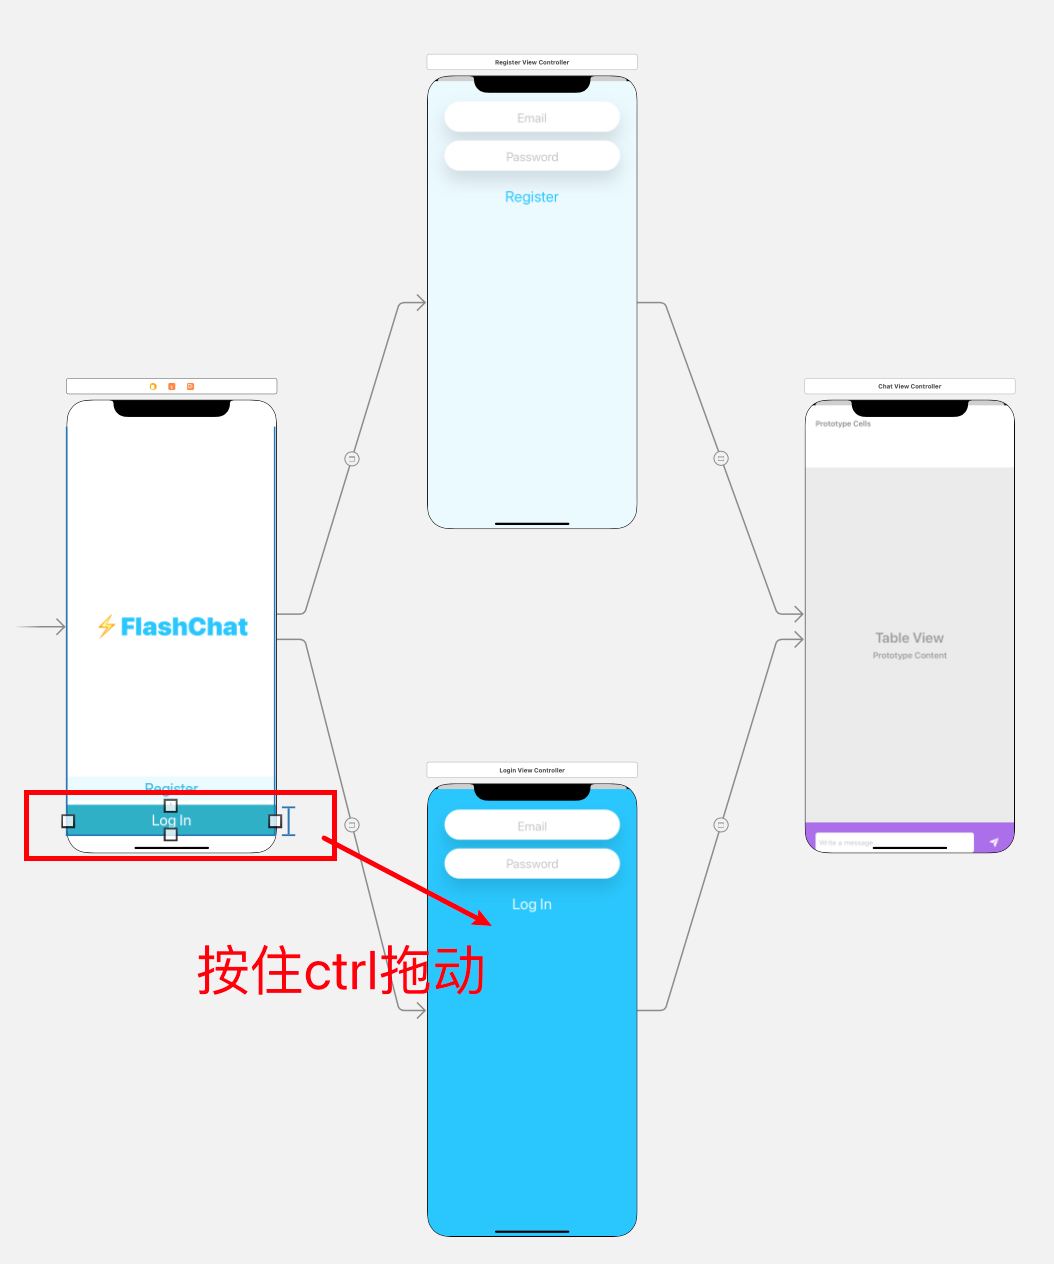
更改名字Identifier
选中箭头,在inspector窗口(cmd+option+5)里面修改Identifier。
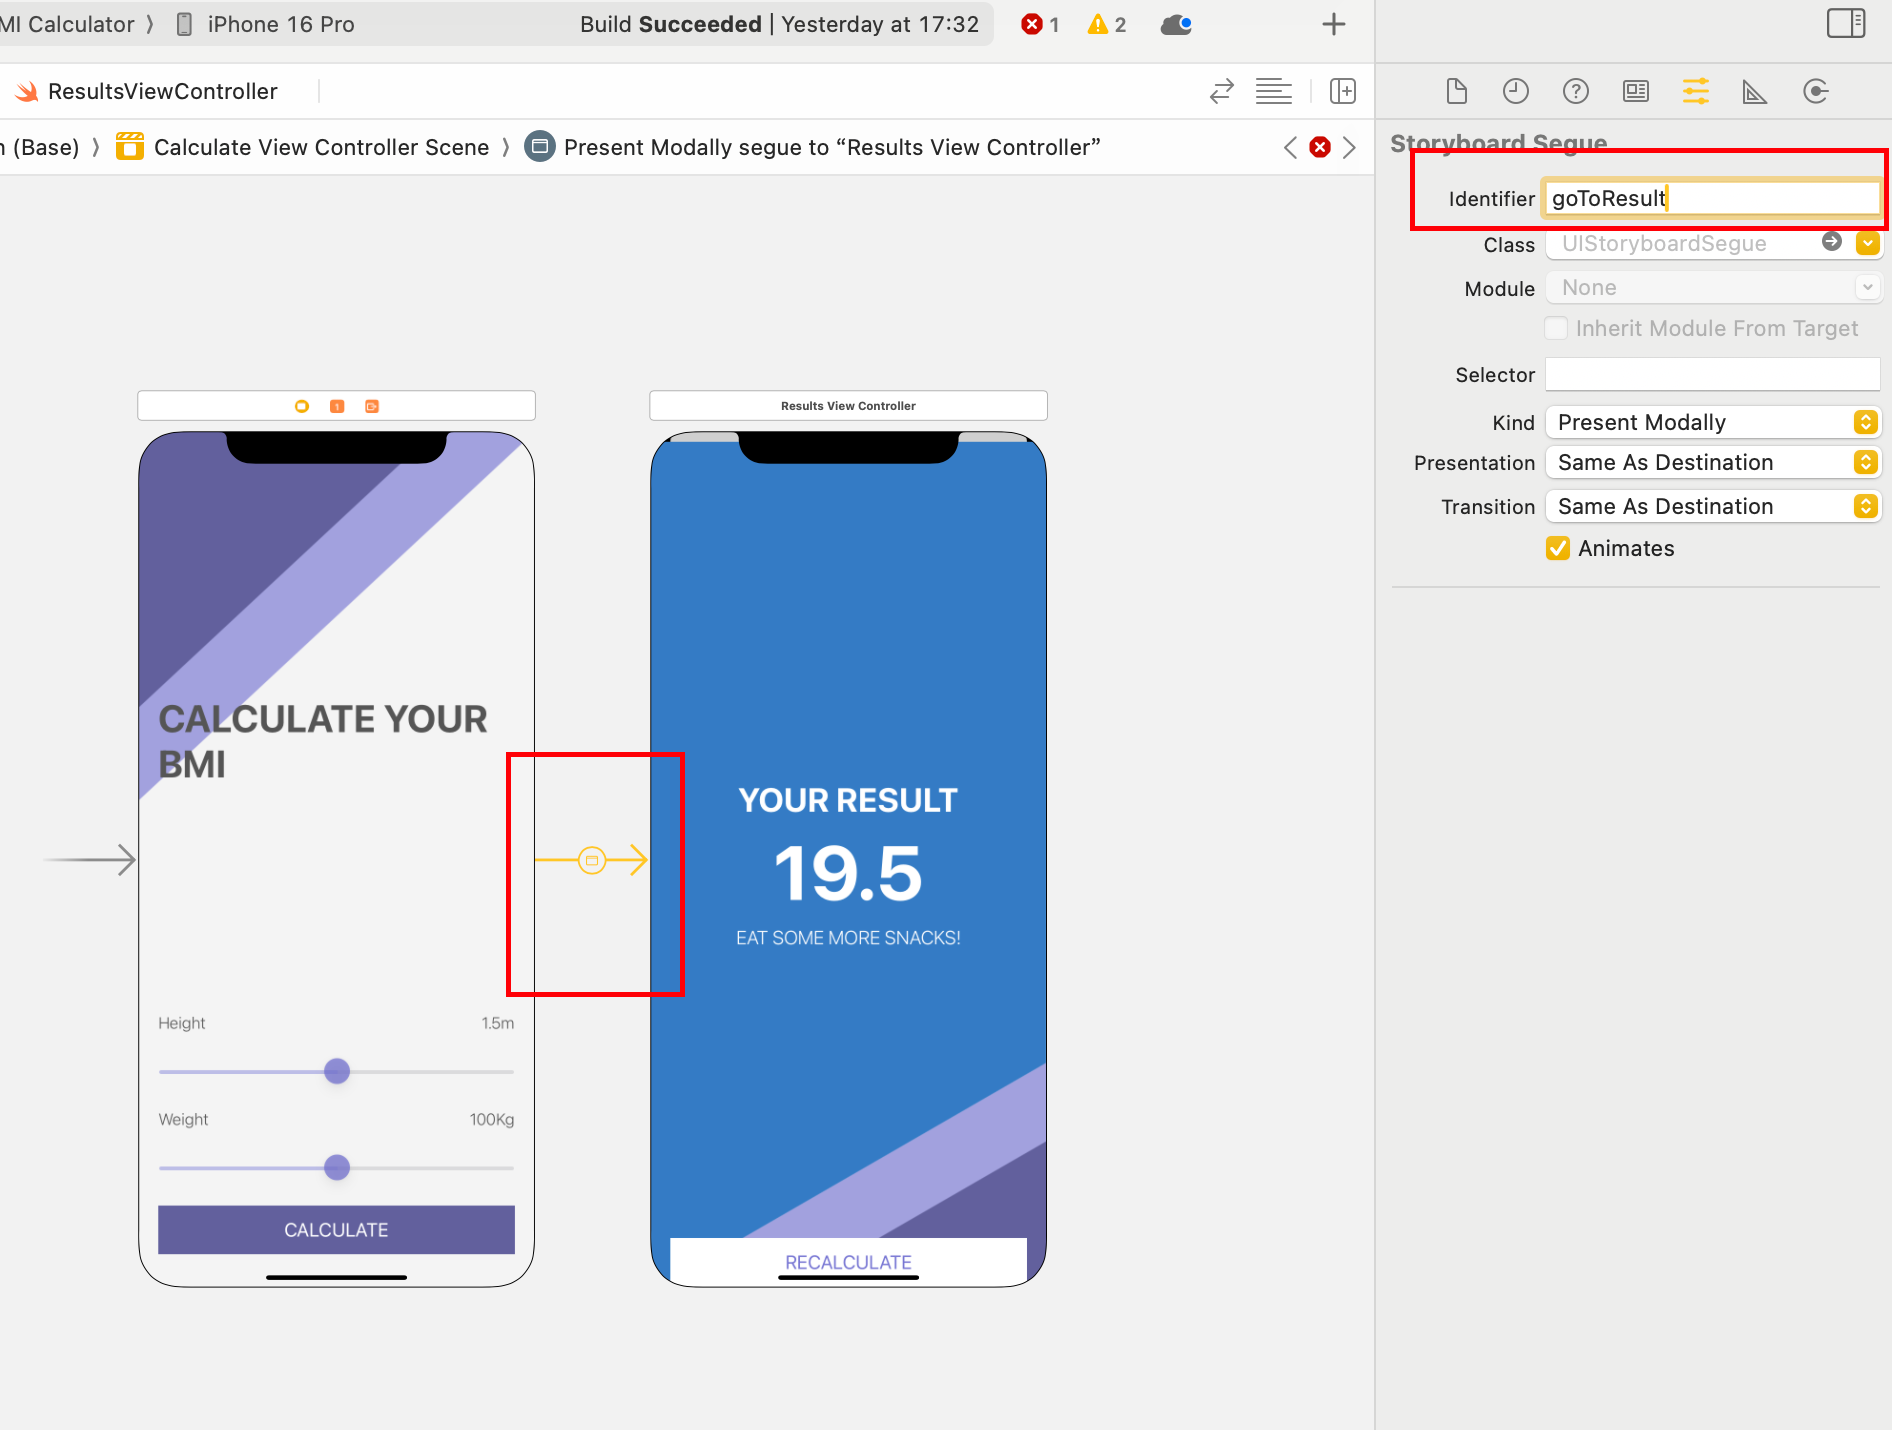
在UIViewController连接
self.performSegue(withIdentifier: "goToResult", sender: self)
在UIViewController里面准备preparefunction
    override func prepare(for segue: UIStoryboardSegue, sender: Any?) {
        if segue.identifier == "goToResult"{
            let destinationVC = segue.destination as! ResultsViewController //为什么要as!?因为downcasting,即告诉它降级到子class-ResultsViewController,而不是原本的UIViewController
            destinationVC.bimValue = "0.0"
        }
    }
如何退后到第一屏?
在第二屏设置:
    @IBAction func recalculatePressed(_ sender: UIButton) {
        self.dismiss(animated: true)
    }
如何看到多屏幕的3D视角?
运行程序时,点击左下角的多屏幕图标。
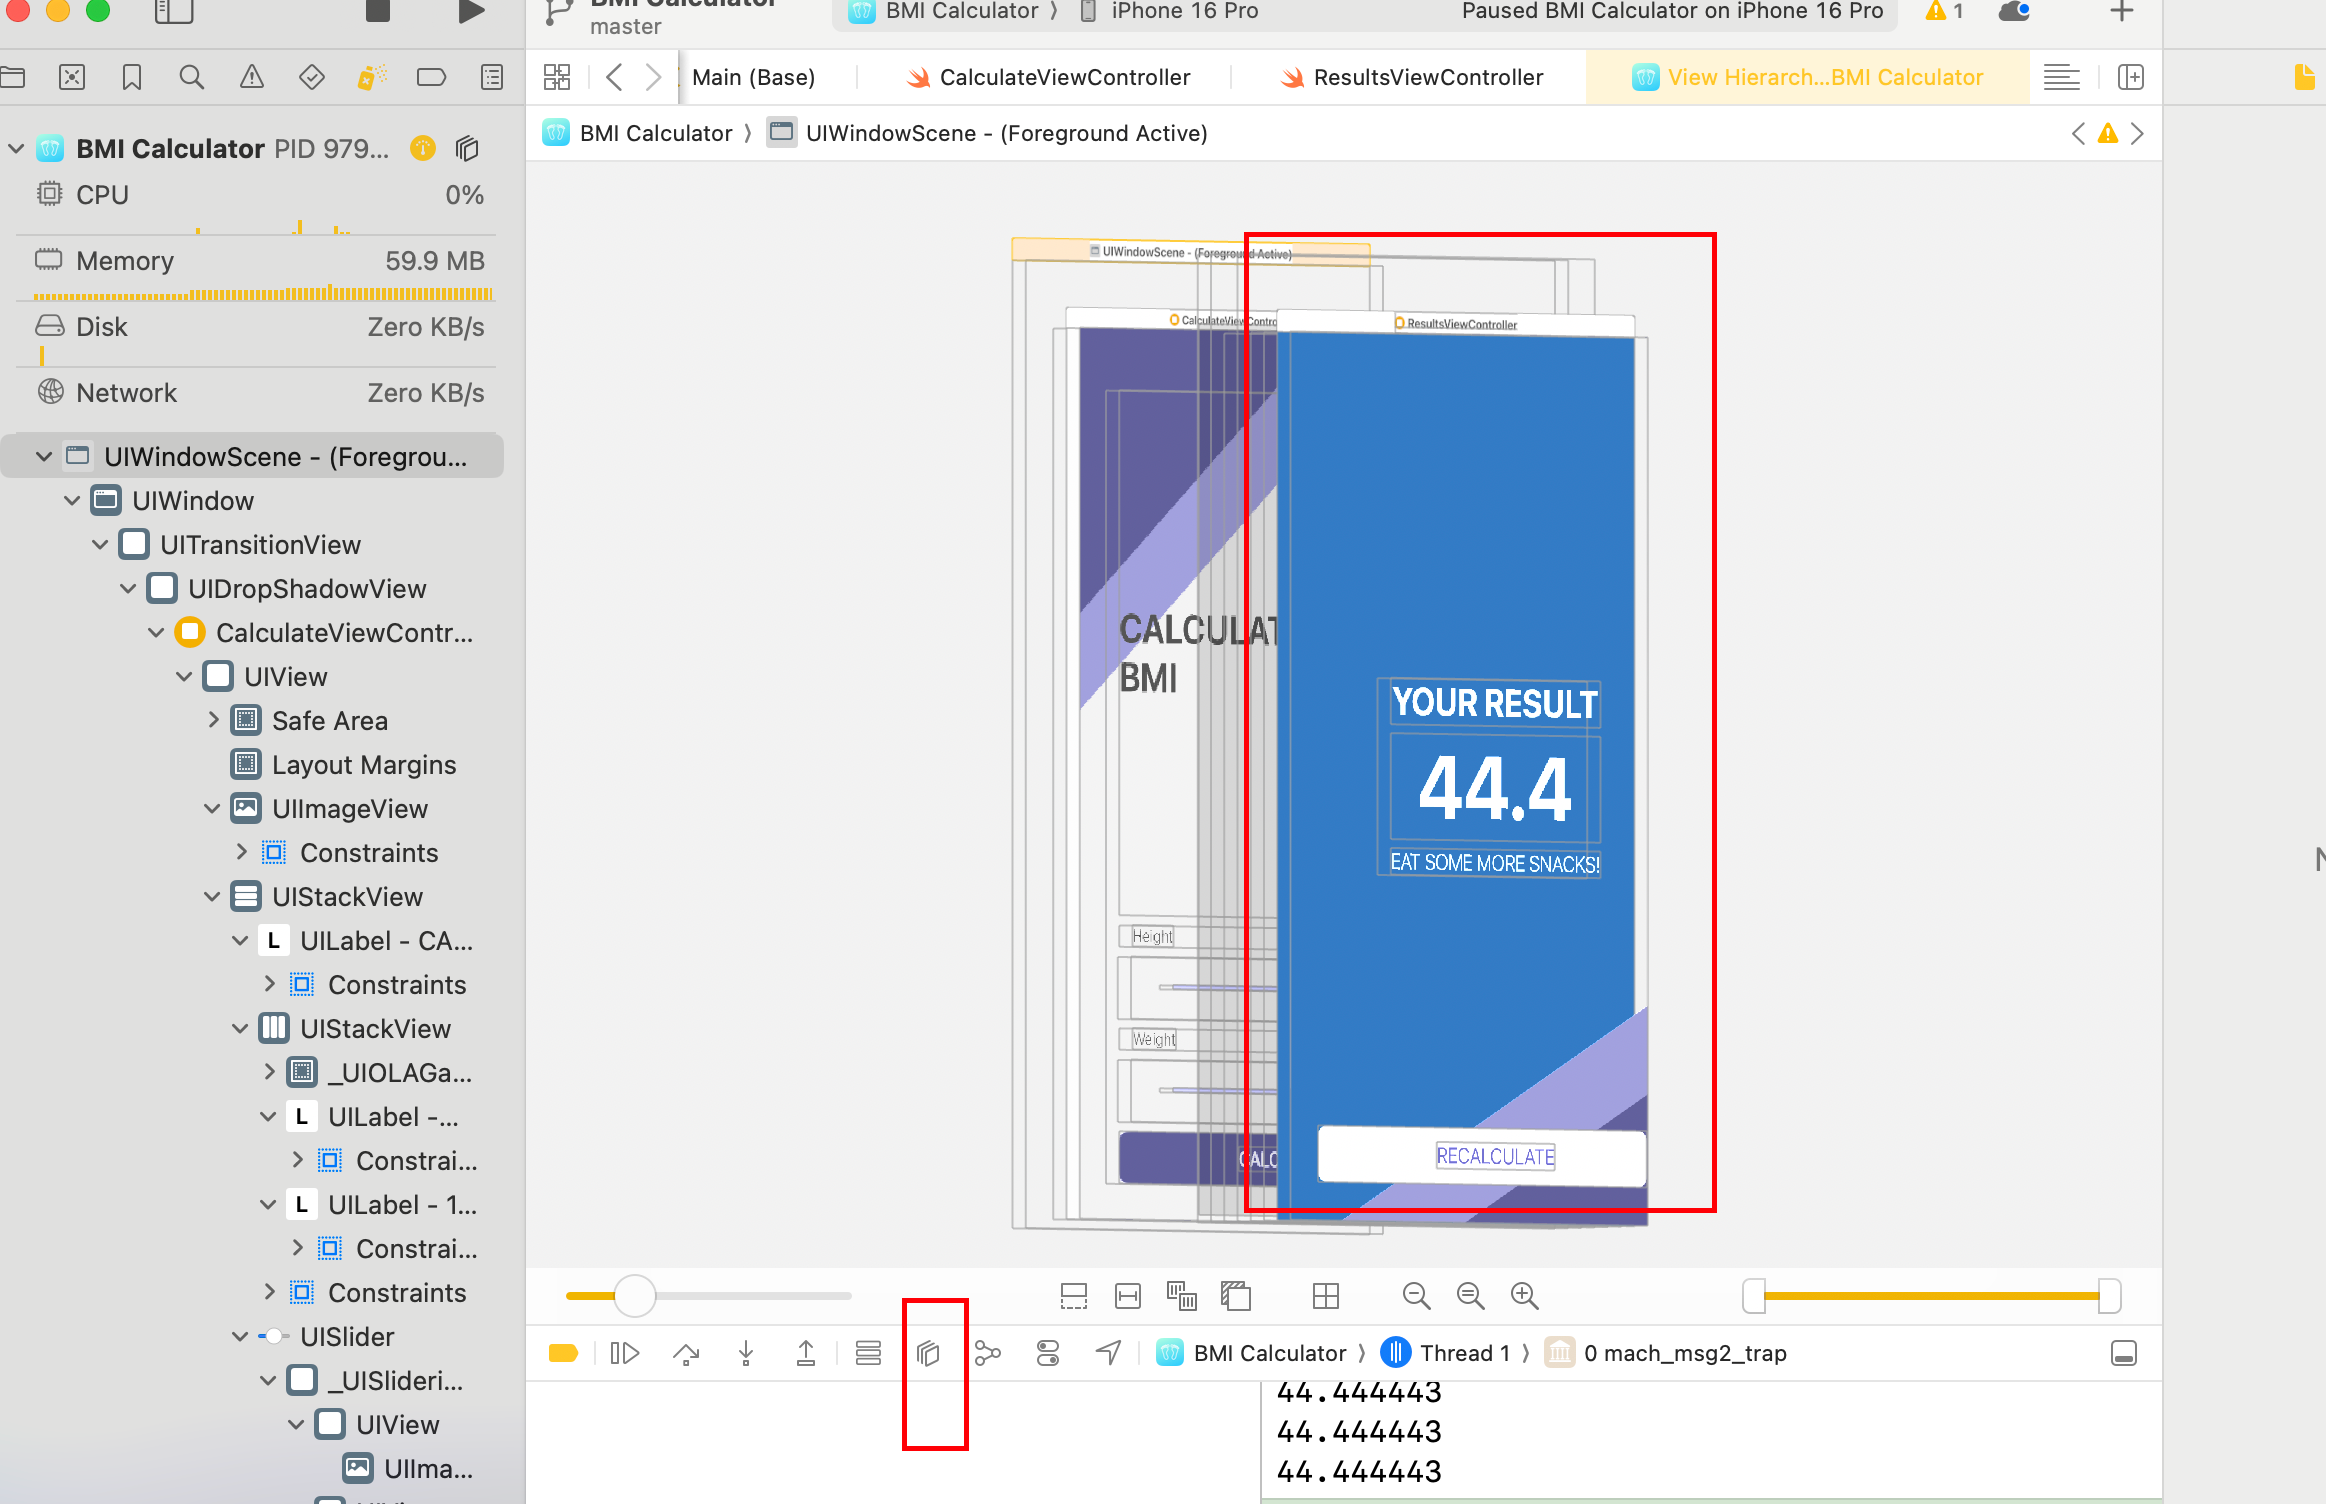
方法二:通过代码创建第二屏
创建SecondViewController的class
import UIKit

class SecondViewController: UIViewController {

    var bmiValue = "0.0"

    override func viewDidLoad() {
        super.viewDidLoad()

        view.backgroundColor = .red //等于UIColor.red,前面可省略

        let label = UILabel()
        label.text = bmiValue
        label.frame = CGRect(x: 0, y: 0, width: 100, height: 50)
        view.addSubview(label)
    }
}
在UIViewController里面使用
let secondVC = SecondViewController()

        secondVC.bmiValue = String(format:"%.1f",bmi)
